Cookie Dough Stuffed Cinnamon Rolls


If I'm being honest, I'm on the Internet way too much. However, I don't watch much television these days and I do discover some really interesting finds. So that makes it totally okay. -- that's my story and I'm sticking to it. I don't even know what I was Googling when I came across the site of a vegan bakeshop in Berkley, California specializing in gourmet cinnamon rolls called Cinnaholic. While I've never personally tasted Cinnaholic's creations their shop concept of customized cinnamon rolls is genius. Customers can choose both the topping and frosting for the cinnamon roll from a variety of flavor combinations. They also offer specialty cinnamon rolls; one of them being a Chocolate Chip Cookie Dough Cinnamon Roll. How great does that sound? AMAZING!

While I admire their vegan mission and use of quality ingredients, I was in a dilemma. I live in Ohio, they are in California so visiting the shop wasn't an option and my wallet was empty so ordering them online wasn't a possibility either.  Not to mention I needed these in my belly pronto therefore whipping up a batch from scratch was out of the question . Solution you ask? Why, send Charlie to the store for a can of Pillsbury Cinnamon Roll Dough and a tub of chocolate chip cookie dough. The results were just as good as I imagined, but probably not as fabulous or as animal friendly as the original.

Ingredients
Refrigerated Pillsbury Cinnamon Roll Dough with Icing
Nestle Toll House Cookie Dough -- you'll have extra so be prepared to have cookies sometime in the near future.

Directions
  • Separate the dough according to package instructions.
  • Using the swirly indentation in the dough as a guide; gently tear the dough into a strip and flatten with the cinnamon side as the edge.
  • Place approximately 1 Tablespoon of cookie dough on each strip of cinnamon roll dough. I put in on in little balls, but you could probably spread it on too.
  • Carefully re-roll the dough and place the roll, cinnamon side up, on a lightly sprayed baking sheet.  If you're using paper dessert cups like I did, put the roll in the cup then place on a baking sheet.  
  • Bake in a 375 degree oven for 17 to 20 minutes.
  • Remove from oven and sparingly use the enclosed frosting. Using too much of the frosting will mask the chocolate chip cookie taste. 
  • For best results serve warm.


Serves
8

A Broken Oven Tip
These turned out so well I may try some different fillings, using different types of cookie dough such as peanut butter, chocolate or chocolate chip with nuts!

Dear Cinnaholic, If by chance you come across this post first let me give you a special Broken Oven shout out "Hi Cinnaholic!".  Secondly, I apologize for bastardizing your creation, but I was inspired and it just sounded too good not to give it a try. I promise if I end up in San Francisco this Summer for vacation, which is a real possibility, I promise to visit your shop and try one....or five for myself.  I also encourage all my 30 regular readers if they are in the area to do the same.

Quick & Easy Pumpkin Muffins


As I've mentioned before, I cook whatever I think will taste good or my family and friends will enjoy. I don't abide by any organic, gluten free, paleo, clean eating, or everything must be made from scratch kind of rules. I'm not a food snob either. I can find as much joy eating a hot dog from a vending cart, as I can an exquisitely prepared meal at a Michelin Star winning restaurant.

I'm a believer that as long as you don't have food allergies or health issues which require you to limit your diet, all food in moderation is fine -- yes, even McDonald's and cheese from a can.

With all that being said, I will now introduce this recipe for THREE ingredient pumpkin muffins. It's just canned pumpkin, white cake mix and pumpkin spice -- that's it! No oil, dragging out the sugar, softening the butter or making a huge mess. Some people may turn there nose up at the cake mix because it's not completely from scratch, but I don't care I love this recipe.  Not only because it's quick and easy, but because the muffins kind of taste like pumpkin cupcakes! We left them plain, but you could also add chocolate chips or top them with canned cream cheese frosting.

Ingredients
1 box of white cake mix (yellow works too)
15 oz. can of pumpkin puree
1 Tablespoon of pumpkin spice

Directions
  • Preheat oven to 350 degrees
  • Spray 12 count, regular size muffin tin with cooking spray or use muffin liners.
  • Mix together pumpkin, cake mix and pumpkin spice and stir until completely combined.
  • Spoon 2 tablespoons of batter into each cup.
  • Put in the oven and bake at 350 degrees for 15 - 17 minutes.
  • Remove from oven let cool and store.

Servings
20 muffins

A Broken Oven Tip
If you would like to make pumpkins muffins from scratch there is a pumpkin muffin recipe on this blog that is a little more involved. I've made both and each one is delicious in their own way.

Stone Fruit Compote with Sweetened Ricotta


Both my sister and sister-in-law make fabulous jams and jellies --"Hi Annette and Kristin." I've forever been envious of this little talent of theirs, so I decided to try a batch of my own and failed miserably. Too sweet, too runny, too seedy -- the list goes on and on. But what I did learn from my experiment is I'm one heck of a fruit cooker. The compote part of this concoction is adapted from a Martha Stewart recipe, while the sweetened ricotta stems from my love of all things cheese and sugar. This is absolutely delicious and can be served for a variety of courses whether it's an appetizer at a brunch, dessert for a luncheon or a special breakfast treat, this recipe is sure to woo and impress your table guests. 

Ingredients

Compote
3 cups of stone fruit such as peaches, nectarines, cherries or plums
Pinch of coarse salt
1 wide strip of lemon zest
1 cinnamon stick
3 tablespoons of honey
2 tablespoons of water

Sweetened Ricotta
2 cups ricotta cheese
2 teaspoons of sugar

Directions
  • Cut fruit into bite sized chunks removing all the pits.  It's fine to leave the skins on the fruit.
  • Place fruit cinnamon stick and lemon peel in a small sauce pan and add honey, water and salt.
  • Cook on medium heat, stirring occasionally until soft approximately 10 to15 minutes
  • Transfer to a storage container and let cool.
  • Store compote in refrigerator for up to 2 weeks.
  • To make the sweetened ricotta mix sugar with cheese and stir.
  • Spread ricotta on toasted crusty bread and top with compote.

Servings
Makes approximately 2 cups of compote and 2 cups of sweetened ricotta
2 cups of sweetened ricotta

A Broken Oven Tip
Other suggestions are to serve over waffles, French toast or pancakes.  Ice cream would be pretty awesome too!


German Potato Pancakes


Last summer, the girls and I attended the incredibly awesome Duck Tape Festival.  It was a great day spending time with my daughters, seeing all the Duck Tape creations, playing games, visiting the vendor booths and of course eating fair food! While I would normally choose to have a Gyro with my funnel cake and sugary lemonade, I instead opted for the potato pancakes one food truck was offering.  I hadn't eaten a good potato pancake in years. Most have been either pan fried mashed potatoes or tasted more like a hash brown patty, but this one tasted just like the potato pancakes my grandma used to make.  Lila tasted the pancake at the fair too and like it a LOT. Last week while we were planning dinners, and thinking about warmer summer days, Lila requested the potato pancakes like the ones we ate at the festival. I did some Googling, combined a few recipes and techniques, and came up with, what I believe is an amazing German potato pancake. Like many of my recipes these are super easy to make and just happen to be extremely easy on the wallet too.

Ingredients
4-5 medium russet potatoes, washed and unpeeled
1/2 cup yellow onion, diced
1 egg
2 tablespoons of flour
Salt and pepper to taste
Oil for cooking

Condiments
Applesauce
Sour cream

Directions
  • Wash and cut the potatoes into cubes and place in a blender, along with the diced onion, flour, egg and salt and pepper to taste.
  • Pulsate the potato mixture until it is the consistency of cooked oatmeal, checking frequently to scrape down the sides.  Be sure not to create a "potato smoothie" or your pancakes will be thin and grainy. If the mixture is too wet, add another tablespoon of flour.
  • Pour oil into skillet and heat.  Drop a 1/4 cup of the potato mixture into the skillet and flatten slightly with a spatula and cook until the bottom is brown, then flip to cook the other side.
  • Serve with a side of sour cream and apple sauce -- or if your kids are like mine, you can serve them with ketchup.

Servings
 
12 - 14 pancakes

A Broken Oven Tip
In addition to the sour cream, another serving option is to top the potato pancake with bacon, cheddar cheese and green onions for a deluxe baked potato kind of feel. 


Lila eating her potato pancakes at the festival.

Savory Shrimp Salsa


It's  been a while since I've updated The Broken Oven, but this recipe was such a hit and totally delicious that I had to add it to the recipe collection.

This past weekend I hosted a Paint & Sip with a few of my favorite women.  What is a "Paint & Sip" you ask?  It is a party where you drink a little wine, (or in our case champagne), indulge in some good snacks (like this shrimp salsa) and laugh with friends, all while learning to paint a picture on canvas under the guidance of an art instructor.  It was extremely fun and everyone's artwork turned out beautiful.

The menu for the event included Prosecco with sugared raspberries, Mimosas, chocolate covered strawberries, Caprese kabobs, mini chicken salad sandwiches with grapes and apples, and this savory shrimp salsa served with white corn chips.  What is winderful about this salsa is that it looks fancy, but it is easy to prepare.

Ingredients
1 lb cooked shrimp tails removed and chopped
1 cup diced tomato
1 avocado
1 cup chopped cucumber
1/4 cup chopped onion
2 limes juiced
2 tbsp chopped cilantro
Kosher salt and pepper to taste

Directions
  • In a small bowl combine red onion, lime juice, salt and pepper. Let them set and marry for a few minutes.
  • In a large bowl combine chopped shrimp, avocado, tomato and cucumber. Next add the cilantro and gently toss.  
  • Add more salt and pepper to taste.

Servings
 
4 cups

A Broken Oven Tip
If you want to kick up the flavor a notch, add a jalapeño pepper with seeds removed and diced or serve it with Tabasco sauce on the side to be added by your guests.

Nut Free Granola


Granola is one of my daughter Lila's favorite snacks. However, she has a peanut and tree nut allergy, which makes us nervous giving her any store bought granola for fear that a "nut free" variety could have been cross contaminated during processing. She's been asking for granola a lot lately and since I've been looking for new lunch ideas I decided to take a stab at making homemade granola.

This is one of those recipes that when I was finished making it I wondered why I didn't tackle it sooner.  It was extremely simple to make and took no time at all.  Lila totally loves the granola and has packed it in her lunch to eat with fruit and yogurt. She also eats it plain and will nibble on it while doing her homework. The big kids like it too, so I definitely would label this recipe a success!

Ingredients
1/3 cup brown sugar
1/3 cup canola oil
1/2 cup honey
2 teaspoons vanilla
3 cups old fashioned oats
4 cups quick oats
1 cup sweetened coconut
1 teaspoon cinnamon

Directions
  • Preheat oven to 350 degrees.
  • In a small saucepan combine the brown sugar, canola oil, honey and vanilla to make a light syrup. Bring to a boil, stir and remove from heat.
  • In a large bowl mix together the oats, coconut, cinnamon and the warm syrup mixture.
  • Stir until oats are well coated and everything is combined.
  • Spread onto two 9×13 non-stick pans -- or you can cover them with parchment paper.
  • Bake at 350 degrees for 10 minutes.
  • After 10 minutes, lightly stir the granola with a spatula, turn off your oven -- don't break it up too much because you want to have those nice chunks when it's finished.
  • Put the granola back into the oven for 3-4 hrs. The remaining heat in the oven will finish slow cooking the granola to a golden crunchy consistency.
  • Remove from oven after 3-4 hours. Let cool and store in an air tight container.
Servings
6 - 8 Cups

A Broken Oven Tip
The recipe is very basic, but you could easily add your favorite dried fruit, seeds, and even nuts if you're not allergic. When mentioned the recipe to my neighbor she suggested adding dried cherries and dark chocolate shavings to the mixture while it's still warm to add a little extra yum to the batch.

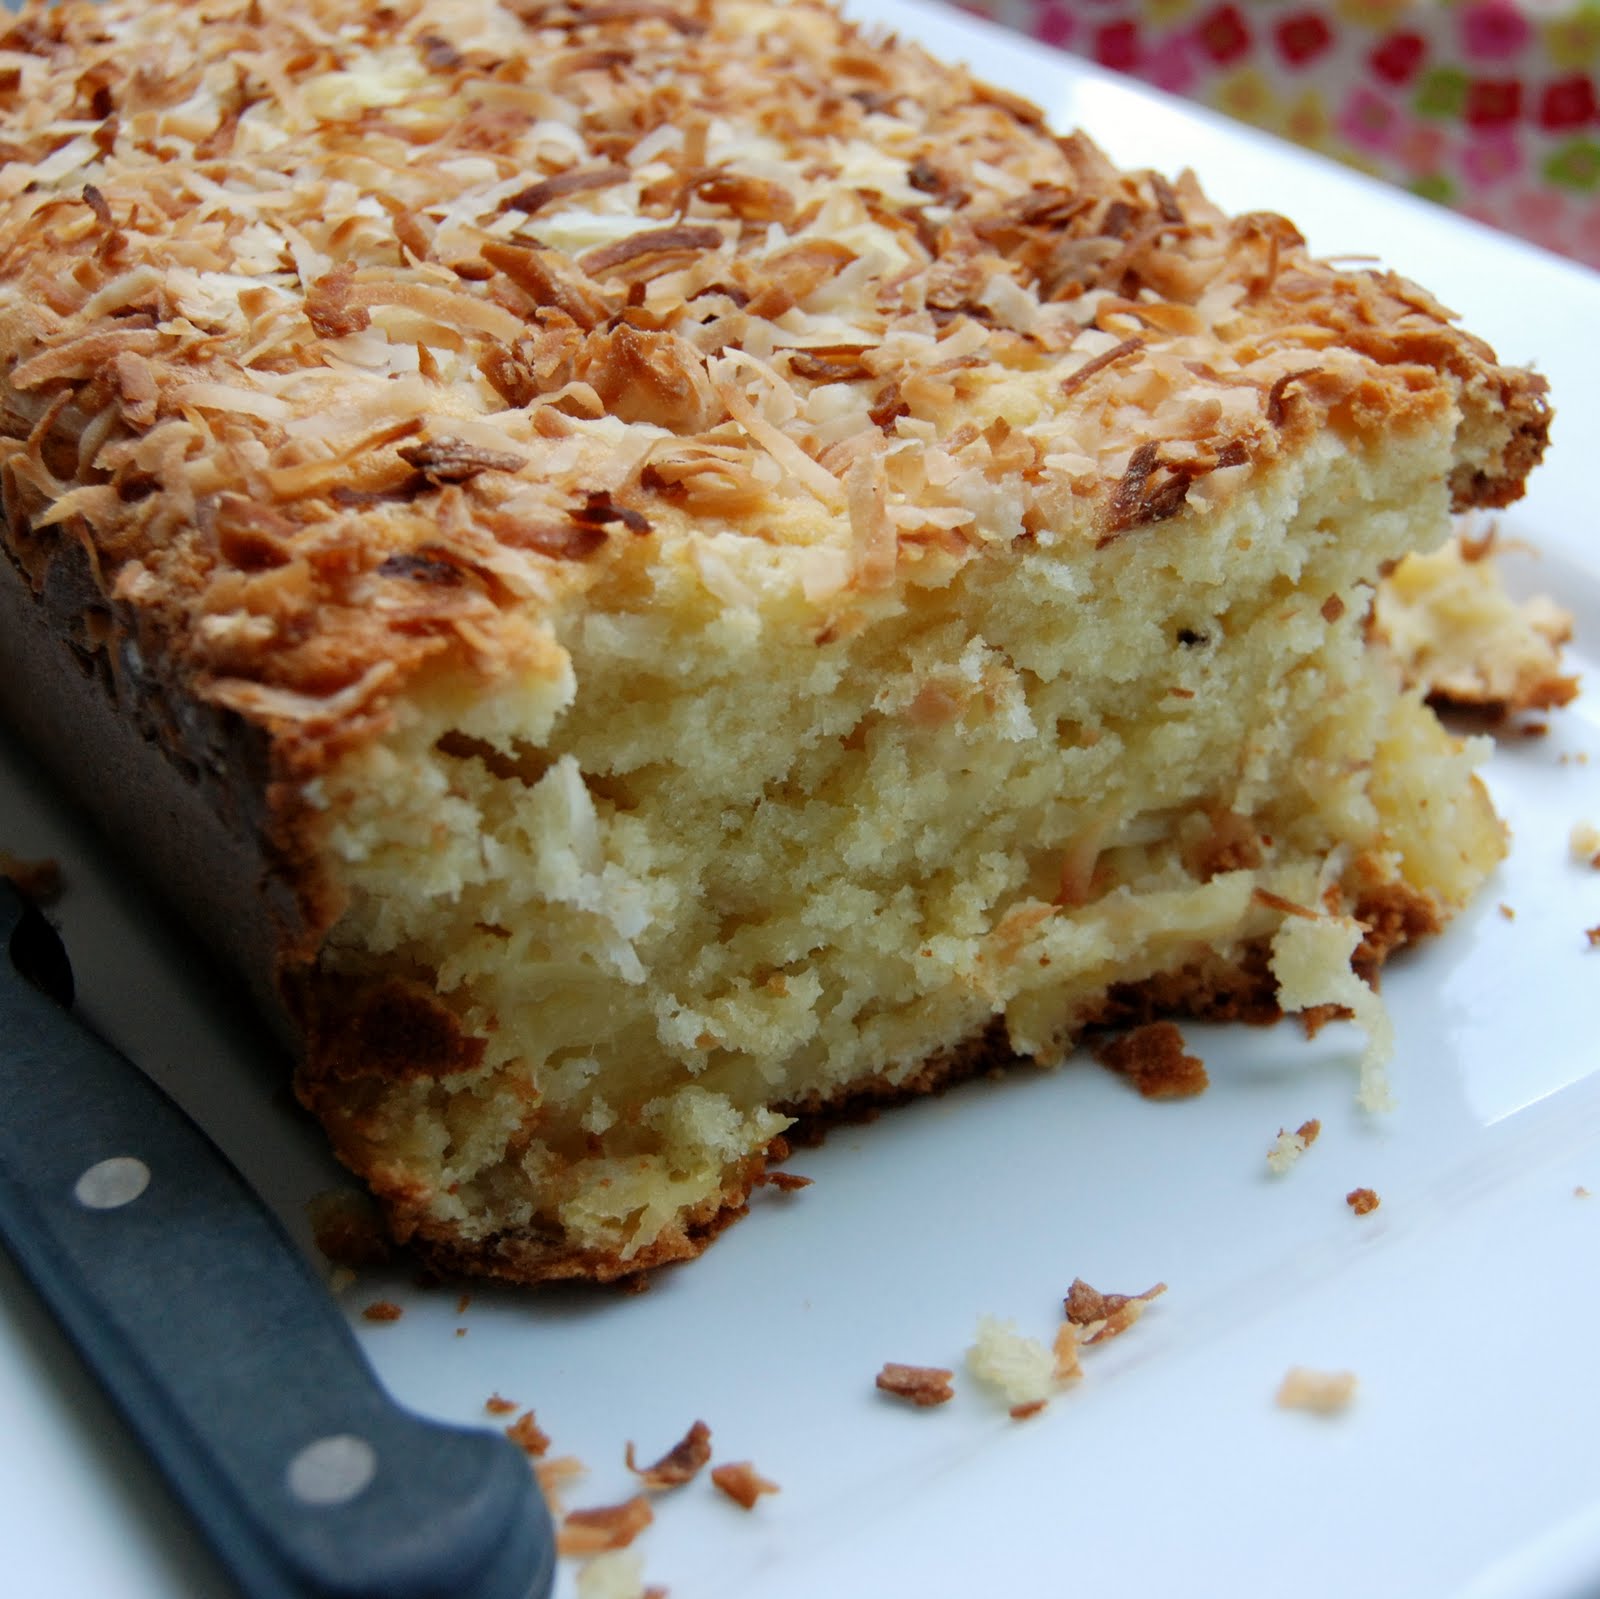
Pineapple Coconut Bread


This Summer I've been craving tons of tropical flavors, especially coconut.  Coconut is one of those foods people love or hate and too much coconut can easily over power other flavors.  This dessert has a mild coconut flavor with a bit of crunch which compliments the sweet pineapple.  The girls loved this and we ate it for breakfast instead of dessert.  It has more of cake like consistency than a quick bread, so you'll probably want to use a fork since it is a bit crumbly.  This recipe also would make a good cupcake, but I need to figure out what temperature to bake them and for how long. I definitely see some experimentation on the horizon along with a gooey batch of coconut cream cheese frosting.

Ingredients
1 1/2 cups sweetened shredded coconut
1 stick unsalted butter, room temperature
1 1/2 cups flour
1/2 teaspoon baking soda
1/2 teaspoon salt
1 cup sugar
3 large eggs
1 cup sour cream
20 ounce can of  pineapple chunks in juice, drained well -- pineapple tidbits work great too.

Directions
  • Preheat oven to 350 degrees.
  • Pour pineapple chunks into a strainer and drain well.
  • Spread coconut on a large baking sheet and bake for 5 minutes or until lightly toasted. Watch carefully.  I burnt my first batch.
  • Grease and flour a 9 x 5-inch loaf pan.
  • Mix together flour, baking soda, and salt then set aside.
  • Using a mixer, cream together butter and sugar until light and fluffy. 
  • Add eggs, one at a time, beating well after each addition. Alternately add flour mixture in three parts and sour cream in two, beginning and ending with flour mixture. Mix just until combined.
  • Fold pineapple and 1 cup toasted coconut into batter. 
  • Pour batter into prepared loaf pan and sprinkle with remaining 1/2 cup of toasted coconut. 
  • Bake 60 to 70 minutes or until a toothpick inserted in center comes out clean.
  • Cover pan with foil halfway through so coconut doesn't burn.
  • Let cake cool for 15 minutes, then remove from pan, and transfer to a wire rack to cool completely.

Servings
8 to 10 slices

A Broken Oven Tip
This batter would be a good base for most quick bread recipes. The batter is a nice thick and would hold up well to heavier add-ins like nuts and dried fruits.

Quadruple C Summer Salad


What do the four C's stand for you ask? Curried Cranberry and Citrus Couscous of course! My sister-in-law made this for a family get together and I absolutely loved it. She is incredibly busy that I didn't want to bother asking her for the recipe so I kind of threw this one together using my taste buds. I think I did a pretty good job if I do say so myself.

This salad is a perfect side dish for an evening meal or by itself for a light lunch. It tastes best after resting in the fridge for a few hours to allow the flavors to meld together and the cranberries to plump up a bit, which makes it a perfect dish to bring for a pot luck Summer cookout.

Ingredients
3 cups cooked plain couscous
1 cup dried cranberries
14.5 ounce can of garbanzo beans rinsed and drained
10 ounce box of frozen peas thawed, rinsed and drained
1 large orange zested and juice squeezed (2 tablespoons of zest and 1/2 cup of juice)
2 tablespoons olive oil
1 tablespoon curry powder

Directions
  • In a large bowl mix together cooked couscous, dried cranberries, rinsed garbanzo beans and thawed peas.
  • Zest approximately 2 tablespoons of orange peel into a small mixing bowl.
  • Squeeze a 1/2 cup of  orange juice into the bowl with the zest. 
  • Whisk the olive oil and curry powder into the orange mixture then pour over couscous and stir to combine.
  • Refrigerate at least 2 hours before serving.

Servings
10 to 12

A Broken Oven Tip
If your family is scared off by the couscous, substitute it with pastina or a wild rice blend.

Mango Coconut Frozen Dessert


Wow! It has been nearly 5 months since I last posted on this blog. My initial reasons for not posting was we all got winter sick then it rolled into one excuse after the other.  When I finally was ready to post again, my cooking mojo vanished.  Honestly, I've been in quite the slump since about April. Slowly, I've been getting back in the groove again and finally created something in the kitchen that is worthy enough to share with all of you.

This mango coconut frozen dessert has a consistency similar to a sorbet.  It is also easy, delicious and vegan! You can make this in an ice cream maker or if you have some time do what I did and use the freeze and stir method.

Hopefully this is the kick in the pants I need to start posting more frequently again. Enjoy and let me know how you like it.

Ingredients
3 cups coconut milk
2 large ripe mangoes - one diced and one sliced
1 cup sugar
2 Tablespoons lime juice
2 Tablespoons arrowroot

Directions
  • Mix arrowroot in 1 cup of the coconut milk and set aside to dissolve.
  • In a food processor or blender, puree the sliced mango until smooth. Set the diced mango aside to be folded into the mixture later.
  • Place the remaining coconut milk, pureed mango, sugar and lime into a large saucepan heat and stir.
  • When the mixture begins to bubble pour the coconut milk and arrowroot mixture into the saucepan and stir to thicken.
  • Remove from the stove and allow the mango mixture to cool slightly and put in a covered plastic container and freeze.  If you're using an ice cream maker pour the mixture into the machine and let it do it's thing.
  • If you're using my freeze and stir method, after one hour of freezing stir in the diced mango. Every hour for three hours stir the mixture. 
  • When you take it out of the freezer it will be very hard and you'll need to let it thaw a few minutes before serving.

Servings
Approximately 6 one cup servings

A Broken Oven Tip
If you don't want to stir every hour, let the mixture freeze for 2-3 hours and toss it in the food processor again, then stir in the diced mango.  This makes for an even smoother consistency and less work for you.

Pretzel Crusted Pork Bites


One of my children's' favorite dinners is city chicken. Which is fine by me because it is cheap and easy to make. However, the traditional dredge in flour and egg, brown in a skillet and broil in the oven preparation method got stale and probably isn't the healthiest, so I started researching some new pork recipes to replace it.  I came across quite a few fancy pork and pretzel recipes and decided to create my own dish using ingredients I know my kids would eat and not relentlessly question me about during dinner. The result is the recipe below and the kids loved it. Give it a try and let me know what you think!

Ingredients
1 lb. city chicken removed from the skewers or other type of boneless pork cut into cubes
5 cups of mini pretzels coarsely crushed
3 eggs
2 Tablespoons of Italian dressing.
1 cup flour
Salt
Pepper
Honey Mustard Dressing for dipping

Directions
  • Preheat oven to 375 degrees.
  • Put mini pretzels in a large resealable plastic bag and crush with a rolling pin or the flat side of a meat tenderizer. This is a great job for little ones who want to help in the kitchen. 
  • When finished crushing the pretzels put them in a medium sized baking dish; an 8 x 8 sized works nicely.
  • In a medium mixing bowl combine the eggs and Italian dressing.
  • Put flour in another large resealable plastic bag.
  • Rinse the city chicken and pat dry. If needed, cut the city chicken into smaller nugget sized pieces.
  • Place the city chicken in the bag with the flour and lightly toss the bag to coat.  Again, this is another great job for little ones who want to help in the kitchen.  Just be sure the bag is sealed.
  • In small batches put the city chicken pieces into the egg mixture then roll in the pretzel mixture to coat.
  • Place the pretzel crusted city chicken bites on a baking sheet lightly coated with cooking spray.
  • Bake in the oven at 375 degrees for 35 minutes or until cooked through.
  • Serve with honey mustard dressing for dipping -- orange marmalade is a favorite here too. 

Servings
4 to 6 servings, 3 to 4 nuggets per serving.

A Broken Oven Tip
While these pretzel pork bites taste great on their own, I've learned kids like to dip their food.  Some other dipping suggestions are; applesauce, ranch dressing, honey, cheese dip, sweet and sour sauce or good old ketchup works just as well.

Butterfly Snack Bags


As another Winter storm looms here in Northeast Ohio I felt the need to bring a little Spring into our lives. Every couple months Lila has a special day at preschool where she gets to perform special classroom tasks and is allowed to bring in an item for show and tell. This week she had her third special day of the school year so we decided to mix it up a little bit and make an edible craft together she could share with her classmates during snack time.

I found the idea for these cute little butterfly snack bags in a Family Fun magazine while perusing periodicals at the bookstore and thought it would be a perfect project to do with my four year old. The only task she needed my help with was twisting the pipe cleaner around the bag. I've included a list of materials I used to create the butterfly bodies, as well as the recipe for the snack mix, but honestly the possibilities are endless, just use your imagination.  The butterfly bodies can be decorated with anything you have in your craft closet such as glitter glue, markers, paint, beads, buttons -- you name it, it would probably work.   If you prefer the snack to be healthy use nuts, dried fruit or fresh veggies.  If you rather it be more of a special treat use candy, cereal or crackers. In my opinion, as long as it is colorful and tastes good it will be perfect.

Butterfly Materials
Spring action clothespins
Glitter glue
Toothpicks
Wiggly eyes
Pipe cleaners 6 inches in length
Snack size resealable plastic bags

Snack Mix Ingredients
2 cups Crispix
2 cups Chocolate Cheerios
1 cup Fruit Flavored Jet Puffed Marshmallows
1 cup M & M Candies
Other colorful bag filler suggestions: Colored GoldFish Crackers, Froot Loops, Skittles, Jelly Belly Jelly Beans and Rainbow Popcorn.

Directions
  • Squeeze the glitter glue on one side of a clothespin.
  • Spread the glue with a toothpick.
  • While the glue is still wet put on the wiggly eyes  near the clipping end of the clothespin and let dry.
  • Combine all the ingredients for the snack mix in a large bowl.
  • Fill each bag with a 1/2 cup of snack mix.
  • Separate the mix in the bag and tie closed with a pipe cleaner.
  • Curl the pipe cleaner to form an antenna.
  • Clip the clothespin across the center of the tied bag to create your beautiful butterfly.


Servings
12 butterfly snack bags filled with a 1/2 cup of snack mix.

A Broken Oven Tip
I am not teacher, but I think this butterfly snack bag would be a perfect project to accompany a lesson on the book The Very Hungry Caterpillar by Eric Carle.  You wouldn't even have to use real food to fill the bags. Instead, use small pieces of paper with pictures of the food the caterpillar eats and place them in the bag making a very colorful, very fun and very beautiful butterfly.

Samoa Cookie Bars


Thin Mints may be the number one selling Girl Scout cookie in America, but my absolute favorite treat those tiny cookie pushers sell are the Samoas -- or are they called Caramel de Lites now? Regardless of the name these days, I've been known to eat an entire box of those caramel, chocolate, coconut morsels of heaven in one day all by myself.  And maybe, just maybe one time I ate two boxes. This year, in an attempt to control my cookie binging I opted not to order any Girl Scout cookies, including my beloved Samoas. However, now that it's March I'm jonesin' for my cookies and I found a loop hole. It is called the Internet. Have you heard of it? Yeah, well you can pretty much find anything on it, including a copy cat Girl Scout cookie recipes. Now, I don't need to wait to be a glutton, I can do it anytime I feel like it!

Even though this is a bar cookie recipe it is a little time consuming with all the melting, cooling and dipping involved, but trust me, it is totally worth the effort. Found a recipe for Thin Mints too, so maybe I'll give that one a try sometime soon.

Ingredients

Cookie Base
1/2 cup sugar
3/4 cup softened butter
1 large egg
1/2 teaspoon vanilla extract
2 cups all purpose flour
1/4 teaspoon salt

Topping
3 1/4 cups shredded sweetened coconut 
12 oz of caramel candy such as Kraft Caramels -- about 50 square candies
1/4 teaspoon salt
3 Tablespoons milk
2 cups semisweet chocolate chips

Directions

Cookie Base
  • Preheat oven to 350 degrees.
  • In a large bowl cream together with a mixer sugar, butter, egg and vanilla.
  • Still using a mixer, gradually add the flour and salt until mixture is moist and a little crumbly. The dough does not need to come together.
  • Press the dough evenly into a 9×13-inch baking pan that is lightly greased or lined with parchment paper. 
  • Bake for 25 minutes, until the edges are lightly browned. 
  • Cool completely before topping.
Topping
  • Toast the coconut in a large skillet over medium heat until golden brown. Once toasted, set aside and allow to cool.
  • Unwrap the caramels and place in a microwave safe bowl with milk and salt. Cook in the microwave 3 minutes until caramel is smooth. I recommend stopping every every minute or so to stir the caramel to help in melt evenly. WARNING: Watch the cooking caramel closely closely as the caramel can boil over.
  • Once the caramel is melted fold in the toasted coconut with a spatula. Sparing approximately a 1/4 cup of coconut to sprinkle on top later.
  • Spoon the coconut and caramel mixture over the cooled cookie base, then spread the topping evenly with a spatula. Sprinkle with the remaining toasted coconut.
  • Let topping set until cooled then cut into bars with a large knife or a pizza cutter 
  • Once bars are cooled and cut, melt the chocolate in a small bowl. Heat in the microwave in 45 second intervals, stirring thoroughly to prevent burning. When I melt 2 cups of chocolate in my microwave it takes about  2 minutes.
  • Once chocolate is completely melted. dip the bottom of each bar into the chocolate and place on a clean piece of parchment or wax paper.
  • Pipe or spoon drizzle the remaining chocolate over the top of the bars to finish.
  • Put in the refrigerator to set.
  • Store in the refrigerator in an airtight container for up to one week.

Servings
30 Bars

A Broken Oven Tip
This may not sound like a good tip, but trust me it is! Share these cookies with family, friends, neighbors, hair stylist, mail carrier...the kid who bags your groceries, etc.  This is to prevent you from eating all the cookies by yourself.

Crabby Cauliflower Chowder


There is no other way to put it. Beginning in December and continuing through most of March, the weather here in Ohio rots. It's cold, snowy and grey and the chill reaches my bones even when I'm safe indoors.  In order to warm me up I like cooking and of course eating soup. I found the base recipe for this chowder on the recipe card carousel located in the produce section at Giant Eagle, but added a few ingredient to make it a tad heartier and more flavorful.

Ingredients
2 cups cauliflower florets chopped -- about 1/2 of one small head. Frozen is fine too..
15 oz. can of chicken broth 
1/2 cup chopped onion
1/2 cup grated carrots
1/4 cup finely chopped red bell pepper
2 teaspoons of lemon zest
2 Tablespoons of parsley
1/2 teaspoon Old Bay Seasoning (optional)
2 cups of half and half
2 Tablespoons of flour
8 oz package of imitation crab flakes -- I like TransOcean Crab Classic
Salt and Pepper to taste

Directions

  • In a large saucepan, combine cauliflower, broth, onion, carrots, red pepper and lemon zest. Bring to a boil, then reduce heat, cover and simmer 6 to 8 minutes or until cauliflower is crisp-tender.
  • Stir together half and half and 2 Tablespoons of flour. Stir into cauliflower mixture and bring to a boil and stir. Soup will begin to thicken. If desired, add another Tablespoon of flour to the soup to make it thicker; add water or more broth to thin it out.
  • Chop crab meat into smaller pieces if necessary, then gently stir into the soup mixture. Heat through and season with salt and pepper to taste.
  • Serve immediately.

Servings
Serves 4 to 6

A Broken Oven Tip
How do you make this chowder even better you ask? Well, by adding some more carbs and fat of course. Sprinkle with some garlic croutons and cheddar for an extra filling variation.  I'm sure bacon or ham would be pretty good too! 

Kristen Stewart's Tortilla Soup


It's time to let my freak flag briefly fly. For those of you who don't already know, I have a bit of an obsession with the Twilight Saga. It doesn't matter if it's the books, movies or the actors who play the characters in the movies I know way too much about this topic.  I know what you're saying, "It can't be that bad." and I promise you it is. Let me conduct a brief experiement by asking a few questions to prove my point. How many of you even know about Midnight Sun? If I say, The Couve or 100 Monkeys do you know what those phrases means? How about the name Kellen Lutz?  Yeah, I didn't think most of you would know those answers, but I do and sadly a helluva lot more.  If you're interested in the answers post a comment and I'll answer them.  Better yet, if you know the answers, you post them in the comments. It would be nice to see if I'm not the only loon out there!

In order to feed my addiction I devour any news and information related to the saga, so when I learned Kristen Stewart, the young woman who portrays Bella Swan (soon to be Cullen ) was the face of  February Vogue I had to pick up a copy. The article was brief, the clothes beautiful and Kristen stunning, but the take away from the article for me was that KStew makes a mean Tortilla Soup and Vogue was kind enough to post the recipe on their website. The soup is deliciously low in fat and calories and perfect for a cold day like today or everyday here since November for that matter.

Kristen, if by chance you Googled yourself and happened to come across this post, you get one of our special Broken Oven shout outs "Hi Kristen! One more thing --would you share your loquat pie recipe with me too?

Ingredients
Soup
2 Tablespoons vegetable oil
3 Tablespoons ground cumin
1 small yellow onion chopped
2 cloves of garlic minced
2 jalapeño peppers seeded and diced chopped
2 green peppers seeded and chopped.
15 ounce can of diced tomatoes -- Hunts Fire Roasted Diced Tomatoes add a little flavor punch.
4 cups chicken broth

Condiments
2 teaspoons of paprika
2 teaspoons of garlic salt
3 Tablespoons of chili powder
1 avocado diced
2 flour tortillas cut into strips
1 cup shredded cheddar cheese
1 lime cut into 8 wedges
1/4 cup chopped fresh cilantro

Directions
  • Heat the oil in a large pot over medium heat.
  • Cook chopped onion, minced garlic and cumin for a few minutes, until the onions are translucent.
  • Add chopped green peppers and cook until tender, about 2-4 minutes.
  • Stir in diced tomatoes, chopped jalapeños and chicken broth.
  • Bring to a boil then reduce heat and simmer for 30 minutes, stirring periodically.
  • Cut tortillas into thin strips and grill for a few minutes until toasted.
  • Serve the soup in bowls and top with condiments.

Servings
6 to 8 servings

A Broken Oven Tip
I added 2 cups of cooked diced chicken to this recipe. It made it a little bit heartier while still maintaining it's healthy qualities.

Slow Cooker Market Style Chicken


Have I mentioned lately how much I love my slow cooker?  If I haven't, let me tell you that next to my Dyson Animal vacuum, the crock pot is my favorite household tool -- I would marry my Dyson if I could, but I think this is neither the time or place to discuss it. Back to the slow cooker. When I'm making my weekly meal plans, I always be sure to include at least one slow cooker meal, sometimes two. Even on the days I don't work it's nice to have dinner ready on time and the only tasks I have to worry about is adding a side dish I can zap in the microwave and a salad I can grab out of a bag. It is also nice that it's nearly impossible to over cook a meal in a slow cooker and the food is always served hot.

When deciding on a slow cooker recipe my number one is that all the cooking needs to be done in the pot.  None of this brown the meat, sauté the vegetables separately, add an ingredient later business. What is the point of that? The beauty of a slow cooker is to toss the ingredients in the pot and forget about it. This chicken recipe is easy, inexpensive and delicious. You really could use any herbs or marinades you like, but this recipe is pretty tasty and in my opinion rivals the rotisserie chickens sold at the market. 

Ingredients
4 to 5 lb whole chicken, skinned
5 large garlic cloves 
1 medium yellow onion
2 teaspoon kosher salt
1/2 teaspoon black pepper
1/2 teaspoon onion powder
1/2 teaspoon garlic powder
1/2 teaspoon thyme
1 teaspoon Italian seasoning
1 teaspoon paprika

Directions.
  • Get out your 6 quart of bigger slow cooker.
  • Remove the skin from the chicken. This is a little time consuming, but in my opinion the result in the taste is much better if you remove the skin. Also note that is why the chicken may look a little rough in the above photo. The skin isn't there to keep it all together so the meat just falls off the bone. May look gross, but so delicious
  • Peel the garlic and leave whole. Peel and quarter a medium sized onion.  Set both aside.
  • In a bowl, combine all of the seasoning. Rub the seasoning mixture all over the chicken, both inside and out. Stuff the onion and garlic inside the chicken.
  • Place the chicken inside the slow cooker breast side down. You do NOT need to add any water. See picture below to see how it fits perfectly in the slow cooker.
  • Cover and cook on high for 4 to 5 hours, or on low for 8 hours.
  • Since the skin was removed and slow cooking the chicken will make it very tender, the meat will easily tear off the bone. See photo below.
Before: Chicken nestled in the slow cooker.
After: Chicken cut and ready to serve.

Servings
4 to 6

A Broken Oven Tip
If you have a smaller slow cooker or don't have a whole chicken in the freezer, use whatever bone in chicken you have on hand.  While I've never tried using chicken pieces I would reduce the cooking time by an  hour or so. Just check a piece or two before serving to make sure it is completely cooked through.
.

Fiesta Lasagna


I'm a sucker for recipes on the back of product packages. Some of them sound like the manufacturer just tried to crowbar their product into the ingredient list, while others have some talented recipe developers in their test kitchens creating great dishes. This recipe, for the most part, is brought to you by the folks at Kraft Foods. Many times I'll be inspired to create something new from these recipes, while other times I'll just tweak the ingredients just a little, this is one of those times. The original recipe was too fat and calorie heavy for me so I trimmed it up a bit by simply replacing a few of the ingredients with low or fat free alternatives. This is a perfect weekday dinner and tastes just as good heated up the next day for a workday lunch.

Ingredients
1 lb. extra lean ground beef
1 package taco seasoning mix
3 ten inch flour tortillas -- sometimes marked burrito size.
1 cup of salsa
15 oz. can of fat free refried beans
1.5 cups of reduced fat Mexican style shredded cheese blend

Directions
  • Preheat oven to 400 degrees.
  • Brown meat in a large skillet and drain any excess fat.
  • Stir in 3/4 cups of the salsa and taco seasoning mix. If the mixture seems too dry add 1 or 2 Tablespoons of water.
  • Simmer on low heat for 10 minutes stirring occasionally.
  • Spray the bottom of a 10 inch baking dish or pie pan with cooking spray.
  • Spread 1/4 cup of the remaining salsa on the bottom of the baking dish and cover with one of the tortillas.
  • Spread 1/2 of the refried beans on the tortilla and top with 1/2 cup of meat mixture and 1/2 cup of cheese.
  • Cover with the second tortilla and repeat by layering 1/2 of the refried beans on the tortilla and top with 1/2 cup of meat mixture and 1/2 cup of cheese.
  • Cover with the third tortilla and top with remaining meat and cheese.
  • Cover with foil and bake for 30 minutes. Remove foil and let stand 5 minutes before serving. It is important to let it rest those 5 minutes so it's easier to cut.
  • Serve as is or with your favorite taco toppings such as red onions, shredded lettuce, black olives and light sour cream.

Servings
6 slices

A Broken Oven Tip
This is a perfect make ahead dish. Assemble it in the morning and pop in the oven when dinner time arrives.

Spicy Skins with Mashed Potato Avocado Dip


I am in a writing, food and photography rut. This photograph is awful, the post is more than likely going to lack wit, however the recipe is pretty good if I do say so myself.  This dip has goat cheese and lemon juice in it which gives it a nice tang and compliments the heat of the spicy skins. This dish can be served as an appetizer,  side dish or on it's own as small meal. Lila and I ate this for lunch the other day along with a fruit salad and we both really enjoyed it.

Ingredients
4 large baking potatoes
1/4 cup olive oil, plus 1 Tablespoon
2 cloves garlic crushed
1/2 teaspoon of paprika
1 teaspoon dried red hot pepper flakes
2 ripe avocados pitted, peeled and cubed
Juice of 1/2 a lime
5 oz soft goat cheese
Course salt .

Directions
  • Preheat oven to 375 degrees.
  • Rub potatoes with 1 Tablespoon of olive oil and place on a baking sheet.  Cook for 1 hour until spuds are tender.
  • Remove from the oven and let cool to the touch. Cut lengthwise and scoop out the flesh of the potato; leaving a 1/2 inch of potato skin. Set the scooped out potato aside for the dip.
  • Cut the skins in half again so the potato is cut into quarters.
  • Combine the remaining oil, garlic, paprika and hot red pepper flakes in a large bowl.  Gently add the potato skins and toss lightly to coat.  
  • Bake in a 375 degree for 45 minutes or until golden brown and crisp. Remove from oven and sprinkle with course salt.
  • While the potato skins are cooking. Combine the extra potato, cubed avocado, crushed garlic, goat cheese and lemon juice. You can use a potato masher or mixer to combine, but I find a food processor or blender works best.
  • Serve dip alongside warm potato skins.

Servings
2 to 4


A Broken Oven Tip
This dip would also be great serve alongside veggies or chips.  Instead of baking the potatoes, use 1 cup of instant mashed potatoes. Still yum, but much easier and no waste.  

Dubble Bubble Bauble Bracelet


Winter Break was tough this year. Between lots of friends busy with their own holiday activities, the severe weather and the flu cycling through our house we pretty much stayed put. However, staying home means the kids need to be entertained. While searching online I came across a project for making candy wreaths. Since it was after the holidays and we really didn't need any wreaths, I thought the kids would enjoy making candy bracelets instead.  This craft was a little difficult for Lila since her tying skills are still developing, but Will and Sophia had a lot of fun with it.  We used Dubble Bubble Gum and Jolly Ranchers, but any candy with a twist closure would work, such as Tootsie Rolls or Starbrite Peppermints. The bracelet is heavy and a bit gaudy, but the kids think they're pretty cool, especially the girls. The picture here are of Lila with her Dubble Bubble Bauble bracelet and Sophia showing off her Jolly Rancher Gems.


Materials
1 large roll of curling gift ribbon that coordinates with your selected candy
45 to 50 pieces of twist closure candy per bracelet.

Directions
  • Measure and fit the ribbon to your child's wrist like a bracelet so they can slip it off, then tie the loose ends securely in a double knot.
  • Cut ribbon the ribbon to 5-7 inch lengths and wrap around one end or tail of the candy and tie in single knot. See image below and ignore Sophia's dirty nails.
  • Now securely tie the candy to the ribbon bracelet using a full double knot. See image below.
  • Every 5 candies push them together and trim the ribbon to desired length and curl. See image below.
  • Continue tying the candies onto the ribbon bracelet until full.

Single Knot
Double Knot 

Curl Ribbon

A Broken Oven Tip
My only complaint is the the bracelet was a bit flimsy. If you want to give the foundation of the bracelet more structure, try shaping sturdy craft wire into a circle instead. A thin plastic or metal bracelet would work great too. If  you don't have an old bracelet lying around the house, I bet you could find them pretty cheap at the dollar store

Dark Chocolate Cherry Dessert Panini


Strawberries and chocolate have been more the rage lately, but dark chocolate and cherries is one of my all time favorite combinations.  I've had dessert paninis before, but they're usually made with strawberries and Nutella.  While many people rage about the wonders of Nutella, in my humble opinion it's overrated and because of the nut allergies in our family we need to stay away from it anyway. In my quest for a perfect panini dessert I found a few recipes substituted the strawberries for cherries; Nutella for hot fudge added some cherry preserves and a sandwich bun and came up with this little lovely slice of heaven. I made the sweetness in this photo on a whim for a middle of a weekday afternoon for a snack.  If making this for a special occasion I would serve it with an Amaretto infused whipped cream for dipping.

Ingredients
2 pieces of a thick sliced white bread -- seedless sandwich buns work fine.
5 cherries pitted and halved.
2 teaspoons cherry preserves such as Dickinson's Family Sweet Black Cherry Preserves
2 teaspoons chilled hot fudge
1 Tablespoon butter
Powder sugar for dusting

Directions

  • Butter the tops and bottoms of both slices of bread
  • Spread two teaspoons of cherry preserves on one side of the bread and top with the pitted and sliced cherries.
  • Spread two teaspoons of chilled hot fudge on one side of the the other piece of bread and place on top of the cherry topped bread.
  • Carefully place the sandwich on a panini press or George Foreman grill and cook for 5 minutes.
  • Remove and sprinkle with powdered sugar, serve warm and eat with your fingers.


Servings
1 dessert panini sandwich


A Broken Oven Tip
If serving these for a larger party, display the sandwiches uncooked along side the panini press with cooking time instructions for a deliciously warm do-it-yourself dessert.

Parmesan Roasted Cauliflower with Almonds


In my opinion, cauliflower is a boring vegetable that just kind of brings your plate down with all it's whiteness.  Stand alone, cauliflower's flavor is kind of blah. It is not quite broccoli and not quite cabbage. You know what I mean? It's mild taste however is the perfect blank canvas for cheese sauces and savory toppings which does make it a versatile side dish. This recipe is perfect served with pork or beef and is simple enough to make weekday, but unique enough to make for a special dinner. If I'm being honest, I could eat the topping alone by the spoonfuls.  I'm actually trying to figure out how to translate the topping into a crusty bread or crispy cracker, so stay tuned.

Ingredients
Cooking spray
1 head large cauliflower, cut into florets
2 Tablespoons extra virgin olive oil
Juice of 1/2 a lemon
1/2 cup golden raisins
1/4 cup grated parmesan cheese
1/4 cup sliced almonds
1/4 cup bread crumbs

Directions
  • Pre-heat oven to 400 degrees
  • Cover baking sheet with foil and spray with cooking spray.
  • Place cauliflower florets on baking sheet.
  • Stir together raisins, bread crumbs, parmesan, almonds and oil in a medium bowl and sprinkle over cauliflower to coat. Much of the mixture will fall to baking sheet, but don't worry. The mixture will toast up nicely and can be scooped up later to serve with the cauliflower.
  • Roast in the center of the oven until cauliflower is golden and the crumbs are toasted, about 20 minutes.
  • Drizzle lemon juice over top of cauliflower and lightly toss on baking sheet. Let roast 5 minutes longer.
  • Serve hot or at room temperature.

Servings
4 to 6

A Broken Oven Tip
Try substituting broccoli for the cauliflower. The taste is a little bolder, but still very delicious. Another substitution is using dried cranberries instead of the raisins.