Showing posts with label Desserts. Show all posts

Cookie Dough Stuffed Cinnamon Rolls


If I'm being honest, I'm on the Internet way too much. However, I don't watch much television these days and I do discover some really interesting finds. So that makes it totally okay. -- that's my story and I'm sticking to it. I don't even know what I was Googling when I came across the site of a vegan bakeshop in Berkley, California specializing in gourmet cinnamon rolls called Cinnaholic. While I've never personally tasted Cinnaholic's creations their shop concept of customized cinnamon rolls is genius. Customers can choose both the topping and frosting for the cinnamon roll from a variety of flavor combinations. They also offer specialty cinnamon rolls; one of them being a Chocolate Chip Cookie Dough Cinnamon Roll. How great does that sound? AMAZING!

While I admire their vegan mission and use of quality ingredients, I was in a dilemma. I live in Ohio, they are in California so visiting the shop wasn't an option and my wallet was empty so ordering them online wasn't a possibility either.  Not to mention I needed these in my belly pronto therefore whipping up a batch from scratch was out of the question . Solution you ask? Why, send Charlie to the store for a can of Pillsbury Cinnamon Roll Dough and a tub of chocolate chip cookie dough. The results were just as good as I imagined, but probably not as fabulous or as animal friendly as the original.

Ingredients
Refrigerated Pillsbury Cinnamon Roll Dough with Icing
Nestle Toll House Cookie Dough -- you'll have extra so be prepared to have cookies sometime in the near future.

Directions
  • Separate the dough according to package instructions.
  • Using the swirly indentation in the dough as a guide; gently tear the dough into a strip and flatten with the cinnamon side as the edge.
  • Place approximately 1 Tablespoon of cookie dough on each strip of cinnamon roll dough. I put in on in little balls, but you could probably spread it on too.
  • Carefully re-roll the dough and place the roll, cinnamon side up, on a lightly sprayed baking sheet.  If you're using paper dessert cups like I did, put the roll in the cup then place on a baking sheet.  
  • Bake in a 375 degree oven for 17 to 20 minutes.
  • Remove from oven and sparingly use the enclosed frosting. Using too much of the frosting will mask the chocolate chip cookie taste. 
  • For best results serve warm.


Serves
8

A Broken Oven Tip
These turned out so well I may try some different fillings, using different types of cookie dough such as peanut butter, chocolate or chocolate chip with nuts!

Dear Cinnaholic, If by chance you come across this post first let me give you a special Broken Oven shout out "Hi Cinnaholic!".  Secondly, I apologize for bastardizing your creation, but I was inspired and it just sounded too good not to give it a try. I promise if I end up in San Francisco this Summer for vacation, which is a real possibility, I promise to visit your shop and try one....or five for myself.  I also encourage all my 30 regular readers if they are in the area to do the same.

Stone Fruit Compote with Sweetened Ricotta


Both my sister and sister-in-law make fabulous jams and jellies --"Hi Annette and Kristin." I've forever been envious of this little talent of theirs, so I decided to try a batch of my own and failed miserably. Too sweet, too runny, too seedy -- the list goes on and on. But what I did learn from my experiment is I'm one heck of a fruit cooker. The compote part of this concoction is adapted from a Martha Stewart recipe, while the sweetened ricotta stems from my love of all things cheese and sugar. This is absolutely delicious and can be served for a variety of courses whether it's an appetizer at a brunch, dessert for a luncheon or a special breakfast treat, this recipe is sure to woo and impress your table guests. 

Ingredients

Compote
3 cups of stone fruit such as peaches, nectarines, cherries or plums
Pinch of coarse salt
1 wide strip of lemon zest
1 cinnamon stick
3 tablespoons of honey
2 tablespoons of water

Sweetened Ricotta
2 cups ricotta cheese
2 teaspoons of sugar

Directions
  • Cut fruit into bite sized chunks removing all the pits.  It's fine to leave the skins on the fruit.
  • Place fruit cinnamon stick and lemon peel in a small sauce pan and add honey, water and salt.
  • Cook on medium heat, stirring occasionally until soft approximately 10 to15 minutes
  • Transfer to a storage container and let cool.
  • Store compote in refrigerator for up to 2 weeks.
  • To make the sweetened ricotta mix sugar with cheese and stir.
  • Spread ricotta on toasted crusty bread and top with compote.

Servings
Makes approximately 2 cups of compote and 2 cups of sweetened ricotta
2 cups of sweetened ricotta

A Broken Oven Tip
Other suggestions are to serve over waffles, French toast or pancakes.  Ice cream would be pretty awesome too!


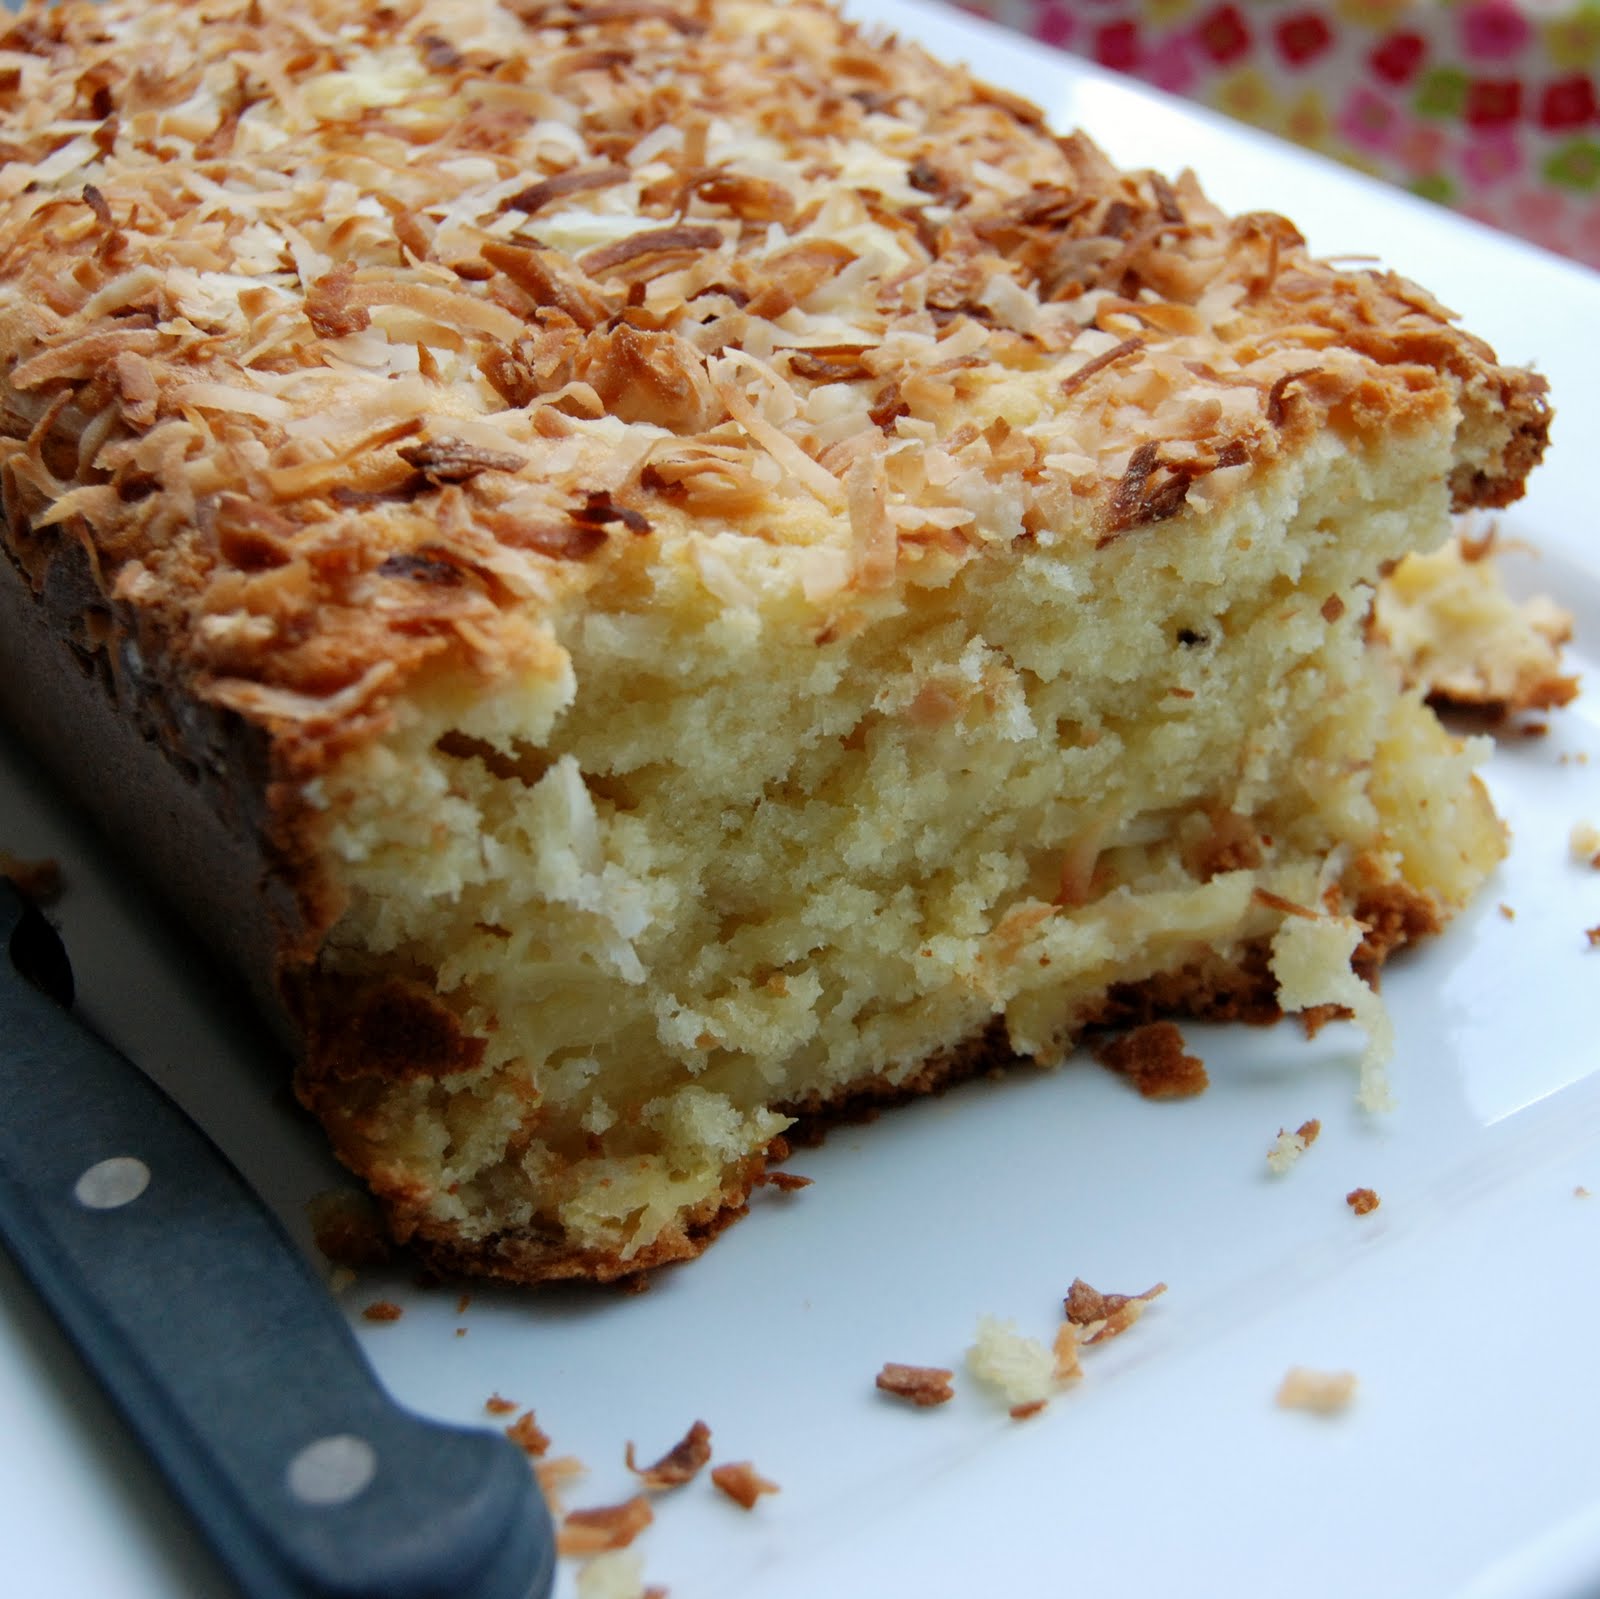
Pineapple Coconut Bread


This Summer I've been craving tons of tropical flavors, especially coconut.  Coconut is one of those foods people love or hate and too much coconut can easily over power other flavors.  This dessert has a mild coconut flavor with a bit of crunch which compliments the sweet pineapple.  The girls loved this and we ate it for breakfast instead of dessert.  It has more of cake like consistency than a quick bread, so you'll probably want to use a fork since it is a bit crumbly.  This recipe also would make a good cupcake, but I need to figure out what temperature to bake them and for how long. I definitely see some experimentation on the horizon along with a gooey batch of coconut cream cheese frosting.

Ingredients
1 1/2 cups sweetened shredded coconut
1 stick unsalted butter, room temperature
1 1/2 cups flour
1/2 teaspoon baking soda
1/2 teaspoon salt
1 cup sugar
3 large eggs
1 cup sour cream
20 ounce can of  pineapple chunks in juice, drained well -- pineapple tidbits work great too.

Directions
  • Preheat oven to 350 degrees.
  • Pour pineapple chunks into a strainer and drain well.
  • Spread coconut on a large baking sheet and bake for 5 minutes or until lightly toasted. Watch carefully.  I burnt my first batch.
  • Grease and flour a 9 x 5-inch loaf pan.
  • Mix together flour, baking soda, and salt then set aside.
  • Using a mixer, cream together butter and sugar until light and fluffy. 
  • Add eggs, one at a time, beating well after each addition. Alternately add flour mixture in three parts and sour cream in two, beginning and ending with flour mixture. Mix just until combined.
  • Fold pineapple and 1 cup toasted coconut into batter. 
  • Pour batter into prepared loaf pan and sprinkle with remaining 1/2 cup of toasted coconut. 
  • Bake 60 to 70 minutes or until a toothpick inserted in center comes out clean.
  • Cover pan with foil halfway through so coconut doesn't burn.
  • Let cake cool for 15 minutes, then remove from pan, and transfer to a wire rack to cool completely.

Servings
8 to 10 slices

A Broken Oven Tip
This batter would be a good base for most quick bread recipes. The batter is a nice thick and would hold up well to heavier add-ins like nuts and dried fruits.

Mango Coconut Frozen Dessert


Wow! It has been nearly 5 months since I last posted on this blog. My initial reasons for not posting was we all got winter sick then it rolled into one excuse after the other.  When I finally was ready to post again, my cooking mojo vanished.  Honestly, I've been in quite the slump since about April. Slowly, I've been getting back in the groove again and finally created something in the kitchen that is worthy enough to share with all of you.

This mango coconut frozen dessert has a consistency similar to a sorbet.  It is also easy, delicious and vegan! You can make this in an ice cream maker or if you have some time do what I did and use the freeze and stir method.

Hopefully this is the kick in the pants I need to start posting more frequently again. Enjoy and let me know how you like it.

Ingredients
3 cups coconut milk
2 large ripe mangoes - one diced and one sliced
1 cup sugar
2 Tablespoons lime juice
2 Tablespoons arrowroot

Directions
  • Mix arrowroot in 1 cup of the coconut milk and set aside to dissolve.
  • In a food processor or blender, puree the sliced mango until smooth. Set the diced mango aside to be folded into the mixture later.
  • Place the remaining coconut milk, pureed mango, sugar and lime into a large saucepan heat and stir.
  • When the mixture begins to bubble pour the coconut milk and arrowroot mixture into the saucepan and stir to thicken.
  • Remove from the stove and allow the mango mixture to cool slightly and put in a covered plastic container and freeze.  If you're using an ice cream maker pour the mixture into the machine and let it do it's thing.
  • If you're using my freeze and stir method, after one hour of freezing stir in the diced mango. Every hour for three hours stir the mixture. 
  • When you take it out of the freezer it will be very hard and you'll need to let it thaw a few minutes before serving.

Servings
Approximately 6 one cup servings

A Broken Oven Tip
If you don't want to stir every hour, let the mixture freeze for 2-3 hours and toss it in the food processor again, then stir in the diced mango.  This makes for an even smoother consistency and less work for you.

Samoa Cookie Bars


Thin Mints may be the number one selling Girl Scout cookie in America, but my absolute favorite treat those tiny cookie pushers sell are the Samoas -- or are they called Caramel de Lites now? Regardless of the name these days, I've been known to eat an entire box of those caramel, chocolate, coconut morsels of heaven in one day all by myself.  And maybe, just maybe one time I ate two boxes. This year, in an attempt to control my cookie binging I opted not to order any Girl Scout cookies, including my beloved Samoas. However, now that it's March I'm jonesin' for my cookies and I found a loop hole. It is called the Internet. Have you heard of it? Yeah, well you can pretty much find anything on it, including a copy cat Girl Scout cookie recipes. Now, I don't need to wait to be a glutton, I can do it anytime I feel like it!

Even though this is a bar cookie recipe it is a little time consuming with all the melting, cooling and dipping involved, but trust me, it is totally worth the effort. Found a recipe for Thin Mints too, so maybe I'll give that one a try sometime soon.

Ingredients

Cookie Base
1/2 cup sugar
3/4 cup softened butter
1 large egg
1/2 teaspoon vanilla extract
2 cups all purpose flour
1/4 teaspoon salt

Topping
3 1/4 cups shredded sweetened coconut 
12 oz of caramel candy such as Kraft Caramels -- about 50 square candies
1/4 teaspoon salt
3 Tablespoons milk
2 cups semisweet chocolate chips

Directions

Cookie Base
  • Preheat oven to 350 degrees.
  • In a large bowl cream together with a mixer sugar, butter, egg and vanilla.
  • Still using a mixer, gradually add the flour and salt until mixture is moist and a little crumbly. The dough does not need to come together.
  • Press the dough evenly into a 9×13-inch baking pan that is lightly greased or lined with parchment paper. 
  • Bake for 25 minutes, until the edges are lightly browned. 
  • Cool completely before topping.
Topping
  • Toast the coconut in a large skillet over medium heat until golden brown. Once toasted, set aside and allow to cool.
  • Unwrap the caramels and place in a microwave safe bowl with milk and salt. Cook in the microwave 3 minutes until caramel is smooth. I recommend stopping every every minute or so to stir the caramel to help in melt evenly. WARNING: Watch the cooking caramel closely closely as the caramel can boil over.
  • Once the caramel is melted fold in the toasted coconut with a spatula. Sparing approximately a 1/4 cup of coconut to sprinkle on top later.
  • Spoon the coconut and caramel mixture over the cooled cookie base, then spread the topping evenly with a spatula. Sprinkle with the remaining toasted coconut.
  • Let topping set until cooled then cut into bars with a large knife or a pizza cutter 
  • Once bars are cooled and cut, melt the chocolate in a small bowl. Heat in the microwave in 45 second intervals, stirring thoroughly to prevent burning. When I melt 2 cups of chocolate in my microwave it takes about  2 minutes.
  • Once chocolate is completely melted. dip the bottom of each bar into the chocolate and place on a clean piece of parchment or wax paper.
  • Pipe or spoon drizzle the remaining chocolate over the top of the bars to finish.
  • Put in the refrigerator to set.
  • Store in the refrigerator in an airtight container for up to one week.

Servings
30 Bars

A Broken Oven Tip
This may not sound like a good tip, but trust me it is! Share these cookies with family, friends, neighbors, hair stylist, mail carrier...the kid who bags your groceries, etc.  This is to prevent you from eating all the cookies by yourself.

Dark Chocolate Cherry Dessert Panini


Strawberries and chocolate have been more the rage lately, but dark chocolate and cherries is one of my all time favorite combinations.  I've had dessert paninis before, but they're usually made with strawberries and Nutella.  While many people rage about the wonders of Nutella, in my humble opinion it's overrated and because of the nut allergies in our family we need to stay away from it anyway. In my quest for a perfect panini dessert I found a few recipes substituted the strawberries for cherries; Nutella for hot fudge added some cherry preserves and a sandwich bun and came up with this little lovely slice of heaven. I made the sweetness in this photo on a whim for a middle of a weekday afternoon for a snack.  If making this for a special occasion I would serve it with an Amaretto infused whipped cream for dipping.

Ingredients
2 pieces of a thick sliced white bread -- seedless sandwich buns work fine.
5 cherries pitted and halved.
2 teaspoons cherry preserves such as Dickinson's Family Sweet Black Cherry Preserves
2 teaspoons chilled hot fudge
1 Tablespoon butter
Powder sugar for dusting

Directions

  • Butter the tops and bottoms of both slices of bread
  • Spread two teaspoons of cherry preserves on one side of the bread and top with the pitted and sliced cherries.
  • Spread two teaspoons of chilled hot fudge on one side of the the other piece of bread and place on top of the cherry topped bread.
  • Carefully place the sandwich on a panini press or George Foreman grill and cook for 5 minutes.
  • Remove and sprinkle with powdered sugar, serve warm and eat with your fingers.


Servings
1 dessert panini sandwich


A Broken Oven Tip
If serving these for a larger party, display the sandwiches uncooked along side the panini press with cooking time instructions for a deliciously warm do-it-yourself dessert.

Chocolate & Peanut Butter Gobs


Some people may call them whoopie pies, but they'll always be gobs to me. Nearly every year from the time I was a toddler to a young teen, my sister and I spent our Summers with my grandma in Western Pennsylvania -- "Hi Grandma!". During our visits we not only spent time with our grandma, but also with our many aunts and older cousins, all of whom are fabulous bakers. -- "Hi Evanko and Skoff aunts and cousins!". The one treat I looked forward to all summer were Chocolate Gobs. A combination of sweet sticky fluffy white frosting sandwiched between chocolate cake.  An absolutely delicious rear end widening treat.  While most of my aunts made these delights at one time or another my fondest memories are the day long assembly lines in Aunt Edith's kitchen. Generations of women mixing, baking, frosting and wrapping each gob with love. Grandma would always let us lick a frosting laden spoon and Aunt Joan would always grab a dozen or so to freeze for us so we could take them home back to Ohio at the end of our visit.

I make the traditional chocolate and marshmallow gobs quite often, but I've seen lots of different recipes for them lately and they definitely seem to be the latest dessert craze around here. Martha Stewart I am not, but boy do I love her recipes and when I found this peanut butter gob one I had to try it. The recipe below deviates a bit from her original, but it's still her inspiration. 

Cookies
1 2/3 cups all-purpose flour
3/4 cup unsweetened cocoa powder
1 1/2 teaspoons baking soda
1/2 teaspoon salt
4 tablespoon softened unsalted butter
1/4 cup vegetable shortening
1/4 cup granulated sugar
3/4 cup packed dark-brown sugar
1 large egg
1 cup milk
1 teaspoon vanilla extract

Peanut Butter Filling
2/3 cup creamy peanut butter
1/2 cup softened unsalted butter
3/4 cup confectioners' sugar

Directions
  • Preheat the oven to 375 degrees. 
  • Sift together flour, cocoa powder, baking soda, and salt into a small bowl; set aside.
  • Put butter, shortening, and sugars into the bowl of an electric mixer fitted with the paddle attachment. Mix on high speed until smooth, about 3 minutes. 
  • Add egg; mix until pale and fluffy, about 2 minutes. Mix in half the flour mixture, then the milk and vanilla. Mix in remaining flour mixture.
  • Drop 2 tablespoons of batter onto baking sheets lined with parchment paper, spacing 2 inches apart. Bake until cookies spring back when lightly touched, 12 to 14 minutes. 
  • Let cool on sheets on wire racks 10 minutes. Transfer cookies to wire racks using a spatula; let cool completely.
  • While cookies are baking start on the filling. Put peanut butter and butter in the bowl of an electric mixer fitted with the paddle attachment. Mix on high speed until smooth. Reduce mixer speed to low. Add confectioners' sugar; mix until combined. Raise speed to high, and mix until fluffy and smooth, about 3 minutes. Season with salt, if desired.
  • Once cookies are cooled completely. Spread or pipe a generous tablespoon of filling on the bottom of 1 cookie. Sandwich with another cookie. Repeat with remaining cookies and filling. Cookies can be refrigerated in single layers in airtight containers up to 3 days. 
  • Bring to room temperature before serving.

Servings
Makes 18 - 24 Gobs

A Broken Oven Tip
The Peanut Butter filling is a little more dense than a traditional gob filling. If you would like to fluff it up a little bit, add 1/3 cup of Marshmallow Fluff to the recipe.

Strawberry & Blueberry Yogurt Pops


Lila is a popsicle addict.  When we were on vacation in Siesta Key this past summer she seriously ate at least three freeze pop like treats a day, if not more.  When we returned home I wanted her to cut back on the junk a bit so I started making various types of frozen pops using different juices, fruit, yogurt and sweeteners.  This recipe definitely was the hands down winner.

Ingredients
1/2 pound of strawberries cleaned and quartered about 1 1/2 to 2 cups
1/2 pound of blueberries  about 1 1/2 cups to 2 cups
2 cups vanilla yogurt
2 tablespoons of sugar

Directions
  • In a blender or food processor puree strawberries with 1 tablespoon of sugar.  Place in a bowl and set aside.
  • Next puree blueberries with 1 tablespoon of sugar.  Place in bowl and set aside.
  • Alternately spoon strawberries, yogurt and blueberries into 3 oz ice pop molds or plastic disposable cups.
  • With a thin bladed knife, swirl mixtures together in an up and down motion.
  • Insert wooded popsicle sticks and freeze about 3 hours or until solid.
  • Keeps in freezer for up to 1 week

Servings
Makes approximately 10 ice pops 3oz in size.

A Broken Oven Tip
Experiment with different types of fruit and yogurts. Raspberries with peach yogurt was another of our favorites too.

Go Fish Jell-O Aquariums


One fish, two fish, red fish, blue fish! How may of us could recite at least one Dr. Seuss book from memory, as well as a few pages of Good Night Moon? This summer I tried my best to keep the kids occupied with fun activities and when I found this edible craft I knew it was a keeper. While these little aquariums didn't photograph very well, they were super easy and super fun to make and brought lots of smiles to the kids' faces. Get creative with your aquarium by using Skittles as gravel or green licorice as seaweed. If you would rather make it a bit healthier use fish shaped cookie cutters to make your aquarium creatures out of fruit.

Ingredients
2 packages Blue Raspberry Jell-O
2 cups boiling water
2 cups cold water
10 Swedish fish or gummy sharks
5 cups or glasses 9 oz each -- I like the Solo Cocktail Cups.
1 toothpick

Directions
  • Stir boiling water into blue gelatin until dissolved.
  • Stir cold water into gelatin.
  • Pour 8 oz of liquid gelatin into cups.
  • Refrigerate about an hour.
  • When Jell-O starts to set gently pierce the Swedish fish and place in cup and shimmy out the toothpick.
  • Refrigerate another hour or until set.

Servings
Makes 5 servings 8 oz. each

A Broken Oven Tip
Next time I make this I think I'll use 1 package blue raspberry and 1 package clear Jell-O flavor such as the white grape so you'd be able to see the fish better.

Cookies & Cream Brownies


Everyone likes Oreo cookies and everyone likes brownies.  Combine the two along with a tall glass of milk and you may just experience a little bit of heaven.  This is a mishmash of recipes I found for Oreo cheesecake, Oreo pie and Oreo cake. I've made some tweaks and combined the best of each. The loves in my life adore these super treats and I'm sure yours will too!

Crust

Ingredients
20 Oreos
3 tablespoons melted butter

Directions
  • Split Oreos and remove the bulk of the cream center with a butter knife. Set cream aside to use in frosting
  • Crush Oreos into fine crumbs.
  • Melt butter and combine with crushed Oreos.
  • Press Oreo mixture into a 8 x 8 baking dish.
  • Place in freezer while preparing brownies.
  • If you have any remaining crumbs mix it in with the brownie batter or use them later as a topping.
Brownies

Ingredients
1 box brownie mix -- Better Crocker Fudge Brownie mix is my favorite.
Ingredients to make mix

Directions
  • Prepare and bake brownie mix according to the package instructions.
  • Allow brownies to cool completely before frosting.
Frosting

Ingredients
4 oz. softened cream cheese
1 cup powdered sugar
Oreo cream centers
1/8 teaspoon salt
1/2 cups heavy whipping cream

Directions
  • Beat heavy cream until stiff peaks form or is the consistency of whipped butter and place in refrigerator to stay chilled.
  • In a separate bowl combine softened cream cheese, powdered sugar, Oreo cream centers and salt. Beat until smooth.
  • Fold whipped cream into the cream cheese mixture.
  • Frost cooled brownies and top with more crushed Oreos.
  • If you're piping the frosting refrigerate it for an hour before using for additional firmness.
  • Store brownies in refrigerator before and after serving.
Servings
9 large brownies
12 small brownies

A Broken Oven Tip
Double the frosting recipe and freeze half of it. This is a great frosting to use on cupcakes, pumpkin muffins, lemon bars and more!

Endless Possibility Ice Cream


Charlie and I received an ice cream maker as a wedding gift. We didn't use it a ton, but when we did, it was fun to use and the ice cream always tasted that much better because we made it ourselves. Well, somewhere between the Cleveland Heights, University Heights and Hudson moves we lost all the pieces. I wanted to buy a new ice cream maker this summer but couldn't justify the cost for the number of times we would actually use it, so I set out to find a no ice cream maker ice cream recipe.  Well, boy did I find it and it's fantastic! The base is simple and to make flavors you simply add different extracts, natural flavorings and stir ins -- the possibilities are endless. I've given a few examples of some of the flavors we've made using this recipe.  It's not super quick and it requires a little hand stirring, but well worth it.

Ice Cream Base

Ingredients
1/2 cup milk
14 oz. can of sweetened condensed milk
Dash of salt
2 cups of heavy whipping cream

Directions
  • In a medium bowl, stir together cold milk, condensed milk and salt. Set aside.
  • In a large bowl, beat heavy cream with an electric mixer until stiff peaks form. 
  • Using the mixer add milk mixture into whipped cream.
  • Pour into shallow 2 quart or 9 x 13 plastic container, cover with lid and freeze for 4 hours, stirring once after 2 hours or when edges start to harden. You can get away with one stir, but I usually do it again at the end of the 3rd hour too for good measure.
  • Freeze in an airtight container up to 10 days. Ice cream, may need to sit for 10 - 15 minutes to soften.
Flavors Made at the Price House

Vanilla - add 1 tablespoon vanilla to condensed milk mixture.

Chocolate - add 3/4 cup cocoa powder to final mixture and combine well with a mixer before first freezing.

Strawberry - add 1/2 cup pureed strawberries to final mixture before first freezing. Fold 1/2 cup chopped strawberries to ice cream during the 2 hour freezer mix. Stir one more time an hour later.

Mint Chocolate Chip - add 2 teaspoons of pure peppermint extract to condensed milk mixture -- a few drops of green food coloring may also be added if desired. Fold 1 cup of dark chocolate chips into the ice cream during the 2 hour freezer mix. Stir one more time an hour later.

Chocolate Peanut Butter Cup - add 3/4 cup cocoa powder to final mixture and combine well with a mixer and stir in 1/3 cup peanut butter before first freezing. Fold in 2/3 cup of chopped peanut butter cups into ice cream during 2 hour freezer mix. Stir one more time an hour later.

Cookies and Cream - add 1 tablespoon vanilla to condensed milk mixture. Stir 1 cup of crushed Oreo cookies into the ice cream during the 2 hour freezer mix. Fold one more time an hour later.

Servings
Makes 3 pints

A Broken Oven Tip
This ice cream can be made as individual flavors in small batches. The ice cream pictured was all made in one day.  I simply doubled the recipe and after the base was made separated it; added the additional ingredients then put in 1 pint plastic food containers.

Rainbow Sugar Sandwich Cookies


Baking from scratch is great and all, but if I'm being honest, most of the time I'm more of a semi homemade kind of gal.  Why bake a cake from scratch when both Betty and Duncan have mastered it quite nicely? So, although every once in a while I may go a little nutty and make homemade fudge, cheesecake, even a tart. I find absolutely no shame in cutting a few corners using prepared baking mixes, crusts or frostings. These fun sandwich cookies were made for an event at Sophia's school.  The kids bee lined for these brightly colored treats and quickly gobbled them up. I can guarantee you the kids could have cared less the cookies were prepared from a mix and frosting from a can.

Ingredients
Sugar Cookie mix -- Better Crocker Sugar Cookie Mix is my favorite
Ingredients to prepare the dough per package instructions
Gel food coloring
Canned frosting -- Better Crocker Whipped Fluffy White is my favorite for this recipe
Sprinkles

Directions
  • Prepare sugar cookie mix per package instructions. You can always make your favorite sugar cookie recipe or go the other extreme and buy a pre-made dough such as the Pillsbury sugar cookie dough in the tube.
  • Divide the dough into 5 equal parts and color each part a different color.  I chose red, yellow, green, blue and purple.
  • Place the dough on a floured surface and roll out to a 1/4 of an inch thickness. Cut the dough with a round cookie cutter.  A small juice glass works well too.
  • Bake according to package directions.
  • When cookies are done baking and cooled, generously frost one half of cookie with frosting and top with another cookie to make a sandwich.
  • Put sprinkles in a bowl and roll the frosted edges of the sandwich cookies in sprinkles.

Servings
Servings will vary based on the sugar cookie mix or recipe you choose to use. The Betty Crocker Sugar Cookie Mix makes 18 - 2 inch sandwich cookies.

A Broken Oven Tip
Use the dough scraps to make these fun tie dyed cookies. Just combine the dough, roll out and cut with a cookie cutter.  The key is not to over mix the dough.

Cafe Mocha Cheesecake


My sister aunt and sister are the cheesecake gurus in the family -- "Hi Aunt Donna and Annette". I don't even own a spring form pan and have never made a cheesecake until now. This Mother's Day instead of buying my mom a gift I decided to bake her a dessert. The original recipe was for a Tiramisu cheesecake, but after I made adjustments for the ingredients I forgot at the grocery store, it turned out to be more of a mocha cheese cake instead. It still looked gorgeous, was plenty of yum, no spring form pan needed and most importantly my mom (and dad) thoroughly enjoyed it!

Ingredients
12 oz. box of vanilla wafers
7 teaspoons of instant coffee
4 tablespoons of  hot water
1/4 cup cocoa powder
4 packages (8 oz. each) of softened cream cheese
1 cup sugar
1 cup of sour cream
4 eggs
1 cup heavy whipping cream
2 tablespoons of powdered sugar

Directions
  • Preheat oven to 325°F.
  • Line a 13 x 9 inch pan with foil, with ends of foil extending over all sides. 
  • Spread wafers onto bottom of prepared pan until completely covered. 
  • Add 4 teaspoons of coffee granules to 4 tablespoons of hot water and stir until dissolved. 
  • Using a pastry or basting brush apply half of the coffee mixture onto wafers in pan. Reserve remaining 2 tablespoons of dissolved coffee for later use.
  • Sift 1/3 of cocoa over coffee covered vanilla wafers
  • Beat cream cheese, sugar and sour cream in a large bowl with mixer until well blended. 
  • Add eggs, 1 at a time, mixing on low speed after each just until blended. 
  • Remove 3-1/2 cups batter and place in medium bowl. 
  • Dissolve 3 teaspoons of coffee granules in remaining 1 teaspoon hot water and stir into removed batter. Note: this mixture is stronger than the first batch of coffee used to coat the wafers. 
  • Spread coffee cream mixture over wafers in pan. Completely cover coffee cream mixture with another layer of vanilla wafers. 
  • Brush with remaining dissolved coffee you set aside earlier, sift another 1/3 of the cocoa over the wafers and cover with remaining plain batter.
  • Bake 50 minutes or until center is almost set. Cool and refrigerate 3 hours. 
  • Use foil handles to lift cheesecake from pan. 
  • Add 2 tablespoons of powdered sugar to 1 cup of heavy whipping cream and beat to stiff peaks.
  • Spread whipping cream over top of chilled cheesecake and sift remaining 1/3 of cocoa powder on top.

Servings
15 to18 This dessert is very rich dessert and small pieces would suffice, especially after a big meal.

A Broken Oven Tip
My mom topped this mocha cheesecake with fresh strawberries for an added flavor, although I think raspberries would be nice too.

S'more Brownies


Brownies are my choice dessert to bake because you can use your favorite box mix and make them extra special by simply adding a few extra ingredients or toppings. This past Spring I was on a fancy brownie making kick creating lots of delicious brownie desserts. The toasted marshmallow fluff on this S'more brownie makes it one of my favorites.

Ingredients
5 graham cracker sheets
1 box of brownie mix -- Betty Crocker Fudge Brownie mix is my favorite
7 oz jar of marshmallow fluff
1/3 cup semi sweet chocolate chips
Ingredients to prepare brownie mix

 Directions
  • Spray an 8 x 8 baking dish generously with cooking spray.
  • Line baking dish with graham crackers. No need to crush the crackers into crumbs. Cut crackers to fit baking dish if needed.
  • Prepare brownie mix according to the package directions and pour over graham crackers.
  • Bake according to package directions.
  • When finished baking, top with marshmallow fluff, broken graham crackers and semi sweet chocolate chips.
  • Place under the broiler on low for a minute or until toasted. WARNING! The topping toasts quickly. Watch closely so it doesn't burn.
  • Best served warm and gooey.

Servings
9 large brownies
12 small brownies

A Broken Oven Tip
This recipe can easily be made in a 9 x 13 baking dish to yield more brownies. Just increase the number of graham crackers from 5 to approximately 9 cracker sheets and double the amount marshmallow fluff.