Slow Cooker Market Style Chicken


Have I mentioned lately how much I love my slow cooker?  If I haven't, let me tell you that next to my Dyson Animal vacuum, the crock pot is my favorite household tool -- I would marry my Dyson if I could, but I think this is neither the time or place to discuss it. Back to the slow cooker. When I'm making my weekly meal plans, I always be sure to include at least one slow cooker meal, sometimes two. Even on the days I don't work it's nice to have dinner ready on time and the only tasks I have to worry about is adding a side dish I can zap in the microwave and a salad I can grab out of a bag. It is also nice that it's nearly impossible to over cook a meal in a slow cooker and the food is always served hot.

When deciding on a slow cooker recipe my number one is that all the cooking needs to be done in the pot.  None of this brown the meat, sauté the vegetables separately, add an ingredient later business. What is the point of that? The beauty of a slow cooker is to toss the ingredients in the pot and forget about it. This chicken recipe is easy, inexpensive and delicious. You really could use any herbs or marinades you like, but this recipe is pretty tasty and in my opinion rivals the rotisserie chickens sold at the market. 

Ingredients
4 to 5 lb whole chicken, skinned
5 large garlic cloves 
1 medium yellow onion
2 teaspoon kosher salt
1/2 teaspoon black pepper
1/2 teaspoon onion powder
1/2 teaspoon garlic powder
1/2 teaspoon thyme
1 teaspoon Italian seasoning
1 teaspoon paprika

Directions.
  • Get out your 6 quart of bigger slow cooker.
  • Remove the skin from the chicken. This is a little time consuming, but in my opinion the result in the taste is much better if you remove the skin. Also note that is why the chicken may look a little rough in the above photo. The skin isn't there to keep it all together so the meat just falls off the bone. May look gross, but so delicious
  • Peel the garlic and leave whole. Peel and quarter a medium sized onion.  Set both aside.
  • In a bowl, combine all of the seasoning. Rub the seasoning mixture all over the chicken, both inside and out. Stuff the onion and garlic inside the chicken.
  • Place the chicken inside the slow cooker breast side down. You do NOT need to add any water. See picture below to see how it fits perfectly in the slow cooker.
  • Cover and cook on high for 4 to 5 hours, or on low for 8 hours.
  • Since the skin was removed and slow cooking the chicken will make it very tender, the meat will easily tear off the bone. See photo below.
Before: Chicken nestled in the slow cooker.
After: Chicken cut and ready to serve.

Servings
4 to 6

A Broken Oven Tip
If you have a smaller slow cooker or don't have a whole chicken in the freezer, use whatever bone in chicken you have on hand.  While I've never tried using chicken pieces I would reduce the cooking time by an  hour or so. Just check a piece or two before serving to make sure it is completely cooked through.
.

Fiesta Lasagna


I'm a sucker for recipes on the back of product packages. Some of them sound like the manufacturer just tried to crowbar their product into the ingredient list, while others have some talented recipe developers in their test kitchens creating great dishes. This recipe, for the most part, is brought to you by the folks at Kraft Foods. Many times I'll be inspired to create something new from these recipes, while other times I'll just tweak the ingredients just a little, this is one of those times. The original recipe was too fat and calorie heavy for me so I trimmed it up a bit by simply replacing a few of the ingredients with low or fat free alternatives. This is a perfect weekday dinner and tastes just as good heated up the next day for a workday lunch.

Ingredients
1 lb. extra lean ground beef
1 package taco seasoning mix
3 ten inch flour tortillas -- sometimes marked burrito size.
1 cup of salsa
15 oz. can of fat free refried beans
1.5 cups of reduced fat Mexican style shredded cheese blend

Directions
  • Preheat oven to 400 degrees.
  • Brown meat in a large skillet and drain any excess fat.
  • Stir in 3/4 cups of the salsa and taco seasoning mix. If the mixture seems too dry add 1 or 2 Tablespoons of water.
  • Simmer on low heat for 10 minutes stirring occasionally.
  • Spray the bottom of a 10 inch baking dish or pie pan with cooking spray.
  • Spread 1/4 cup of the remaining salsa on the bottom of the baking dish and cover with one of the tortillas.
  • Spread 1/2 of the refried beans on the tortilla and top with 1/2 cup of meat mixture and 1/2 cup of cheese.
  • Cover with the second tortilla and repeat by layering 1/2 of the refried beans on the tortilla and top with 1/2 cup of meat mixture and 1/2 cup of cheese.
  • Cover with the third tortilla and top with remaining meat and cheese.
  • Cover with foil and bake for 30 minutes. Remove foil and let stand 5 minutes before serving. It is important to let it rest those 5 minutes so it's easier to cut.
  • Serve as is or with your favorite taco toppings such as red onions, shredded lettuce, black olives and light sour cream.

Servings
6 slices

A Broken Oven Tip
This is a perfect make ahead dish. Assemble it in the morning and pop in the oven when dinner time arrives.

Spicy Skins with Mashed Potato Avocado Dip


I am in a writing, food and photography rut. This photograph is awful, the post is more than likely going to lack wit, however the recipe is pretty good if I do say so myself.  This dip has goat cheese and lemon juice in it which gives it a nice tang and compliments the heat of the spicy skins. This dish can be served as an appetizer,  side dish or on it's own as small meal. Lila and I ate this for lunch the other day along with a fruit salad and we both really enjoyed it.

Ingredients
4 large baking potatoes
1/4 cup olive oil, plus 1 Tablespoon
2 cloves garlic crushed
1/2 teaspoon of paprika
1 teaspoon dried red hot pepper flakes
2 ripe avocados pitted, peeled and cubed
Juice of 1/2 a lime
5 oz soft goat cheese
Course salt .

Directions
  • Preheat oven to 375 degrees.
  • Rub potatoes with 1 Tablespoon of olive oil and place on a baking sheet.  Cook for 1 hour until spuds are tender.
  • Remove from the oven and let cool to the touch. Cut lengthwise and scoop out the flesh of the potato; leaving a 1/2 inch of potato skin. Set the scooped out potato aside for the dip.
  • Cut the skins in half again so the potato is cut into quarters.
  • Combine the remaining oil, garlic, paprika and hot red pepper flakes in a large bowl.  Gently add the potato skins and toss lightly to coat.  
  • Bake in a 375 degree for 45 minutes or until golden brown and crisp. Remove from oven and sprinkle with course salt.
  • While the potato skins are cooking. Combine the extra potato, cubed avocado, crushed garlic, goat cheese and lemon juice. You can use a potato masher or mixer to combine, but I find a food processor or blender works best.
  • Serve dip alongside warm potato skins.

Servings
2 to 4


A Broken Oven Tip
This dip would also be great serve alongside veggies or chips.  Instead of baking the potatoes, use 1 cup of instant mashed potatoes. Still yum, but much easier and no waste.  

Dubble Bubble Bauble Bracelet


Winter Break was tough this year. Between lots of friends busy with their own holiday activities, the severe weather and the flu cycling through our house we pretty much stayed put. However, staying home means the kids need to be entertained. While searching online I came across a project for making candy wreaths. Since it was after the holidays and we really didn't need any wreaths, I thought the kids would enjoy making candy bracelets instead.  This craft was a little difficult for Lila since her tying skills are still developing, but Will and Sophia had a lot of fun with it.  We used Dubble Bubble Gum and Jolly Ranchers, but any candy with a twist closure would work, such as Tootsie Rolls or Starbrite Peppermints. The bracelet is heavy and a bit gaudy, but the kids think they're pretty cool, especially the girls. The picture here are of Lila with her Dubble Bubble Bauble bracelet and Sophia showing off her Jolly Rancher Gems.


Materials
1 large roll of curling gift ribbon that coordinates with your selected candy
45 to 50 pieces of twist closure candy per bracelet.

Directions
  • Measure and fit the ribbon to your child's wrist like a bracelet so they can slip it off, then tie the loose ends securely in a double knot.
  • Cut ribbon the ribbon to 5-7 inch lengths and wrap around one end or tail of the candy and tie in single knot. See image below and ignore Sophia's dirty nails.
  • Now securely tie the candy to the ribbon bracelet using a full double knot. See image below.
  • Every 5 candies push them together and trim the ribbon to desired length and curl. See image below.
  • Continue tying the candies onto the ribbon bracelet until full.

Single Knot
Double Knot 

Curl Ribbon

A Broken Oven Tip
My only complaint is the the bracelet was a bit flimsy. If you want to give the foundation of the bracelet more structure, try shaping sturdy craft wire into a circle instead. A thin plastic or metal bracelet would work great too. If  you don't have an old bracelet lying around the house, I bet you could find them pretty cheap at the dollar store

Dark Chocolate Cherry Dessert Panini


Strawberries and chocolate have been more the rage lately, but dark chocolate and cherries is one of my all time favorite combinations.  I've had dessert paninis before, but they're usually made with strawberries and Nutella.  While many people rage about the wonders of Nutella, in my humble opinion it's overrated and because of the nut allergies in our family we need to stay away from it anyway. In my quest for a perfect panini dessert I found a few recipes substituted the strawberries for cherries; Nutella for hot fudge added some cherry preserves and a sandwich bun and came up with this little lovely slice of heaven. I made the sweetness in this photo on a whim for a middle of a weekday afternoon for a snack.  If making this for a special occasion I would serve it with an Amaretto infused whipped cream for dipping.

Ingredients
2 pieces of a thick sliced white bread -- seedless sandwich buns work fine.
5 cherries pitted and halved.
2 teaspoons cherry preserves such as Dickinson's Family Sweet Black Cherry Preserves
2 teaspoons chilled hot fudge
1 Tablespoon butter
Powder sugar for dusting

Directions

  • Butter the tops and bottoms of both slices of bread
  • Spread two teaspoons of cherry preserves on one side of the bread and top with the pitted and sliced cherries.
  • Spread two teaspoons of chilled hot fudge on one side of the the other piece of bread and place on top of the cherry topped bread.
  • Carefully place the sandwich on a panini press or George Foreman grill and cook for 5 minutes.
  • Remove and sprinkle with powdered sugar, serve warm and eat with your fingers.


Servings
1 dessert panini sandwich


A Broken Oven Tip
If serving these for a larger party, display the sandwiches uncooked along side the panini press with cooking time instructions for a deliciously warm do-it-yourself dessert.

Parmesan Roasted Cauliflower with Almonds


In my opinion, cauliflower is a boring vegetable that just kind of brings your plate down with all it's whiteness.  Stand alone, cauliflower's flavor is kind of blah. It is not quite broccoli and not quite cabbage. You know what I mean? It's mild taste however is the perfect blank canvas for cheese sauces and savory toppings which does make it a versatile side dish. This recipe is perfect served with pork or beef and is simple enough to make weekday, but unique enough to make for a special dinner. If I'm being honest, I could eat the topping alone by the spoonfuls.  I'm actually trying to figure out how to translate the topping into a crusty bread or crispy cracker, so stay tuned.

Ingredients
Cooking spray
1 head large cauliflower, cut into florets
2 Tablespoons extra virgin olive oil
Juice of 1/2 a lemon
1/2 cup golden raisins
1/4 cup grated parmesan cheese
1/4 cup sliced almonds
1/4 cup bread crumbs

Directions
  • Pre-heat oven to 400 degrees
  • Cover baking sheet with foil and spray with cooking spray.
  • Place cauliflower florets on baking sheet.
  • Stir together raisins, bread crumbs, parmesan, almonds and oil in a medium bowl and sprinkle over cauliflower to coat. Much of the mixture will fall to baking sheet, but don't worry. The mixture will toast up nicely and can be scooped up later to serve with the cauliflower.
  • Roast in the center of the oven until cauliflower is golden and the crumbs are toasted, about 20 minutes.
  • Drizzle lemon juice over top of cauliflower and lightly toss on baking sheet. Let roast 5 minutes longer.
  • Serve hot or at room temperature.

Servings
4 to 6

A Broken Oven Tip
Try substituting broccoli for the cauliflower. The taste is a little bolder, but still very delicious. Another substitution is using dried cranberries instead of the raisins.

Sweet Potato & Peanut Butter Dog Treats


Somewhere between here and there I've lost my mind. How do I know this you ask? Because, I made homemade dog treats for our dog Henry who I only kinda-sorta-maybe just a little bit like.  Henry's birthday is on New Year's Eve so in addition to the holiday festivities, the kids also like to do a little something special to celebrate.  We usually get him a few presents and have some cupcakes for ourselves. However, this year the kids wanted to make him a homemade treat.  We tossed around the idea of a cake, but thought it would go to waste since there wouldn't be other furry friends in attendance, so we settled on these dog treats. Henry did love these treats, but I'm not sure that says a lot seeing as he lives on a steady diet of socks, paper towels and Popsicle sticks.

There are countless dog treat recipes on the internet but this one matched the ingredients I had on hand.  Actually, the original recipe called for pumpkin, but I substituted sweet potatoes and added a little honey too.  This recipe does use wheat flour, so if your dog has wheat allergies, you may can use rice flour instead.

Ingredients
16 oz can of cut sweet potatoes drained and mashed
2 1/2 cups of wheat flour
2 eggs
1 Tablespoon of honey
2 Tablespoons of peanut butter
1/2 teaspoon of cinnamon
1/2 teaspoon of salt

Directions
  • Preheat oven to 350 degrees.
  • Mix together mashed sweet potatoes, wheat flour, eggs, honey, peanut butter, cinnamon and salt. Work the dough with your hands until firm. If you have a stand mixer using the dough hook attachment will make this step easier. 
  • Add water or flour to the dough as needed to help make the dough workable.  It should have the consistency of Play-Dough.
  • Roll the dough with a rolling pin on a floured surface about a 1/4 inch thick and cut with cookie cutters.
  • Place on baking sheet and bake in preheated 350 degree oven for about 25 minutes or until hard.  Cooking times will vary on the thickness and size of your treats.
  • Store in a airtight container for 1 week or freeze up to 6 months.

Servings
24 to 36 treats depending on the size and thickness of the treats.

A Broken Oven Tip
If you're insane like me and want to frost the dog treats mix 2 Tablespoons of wheat or rice flour with 8 oz. of cream cheese. Spread or pipe onto treats as desired. Store frosted treats in refrigerator up to one week.
.

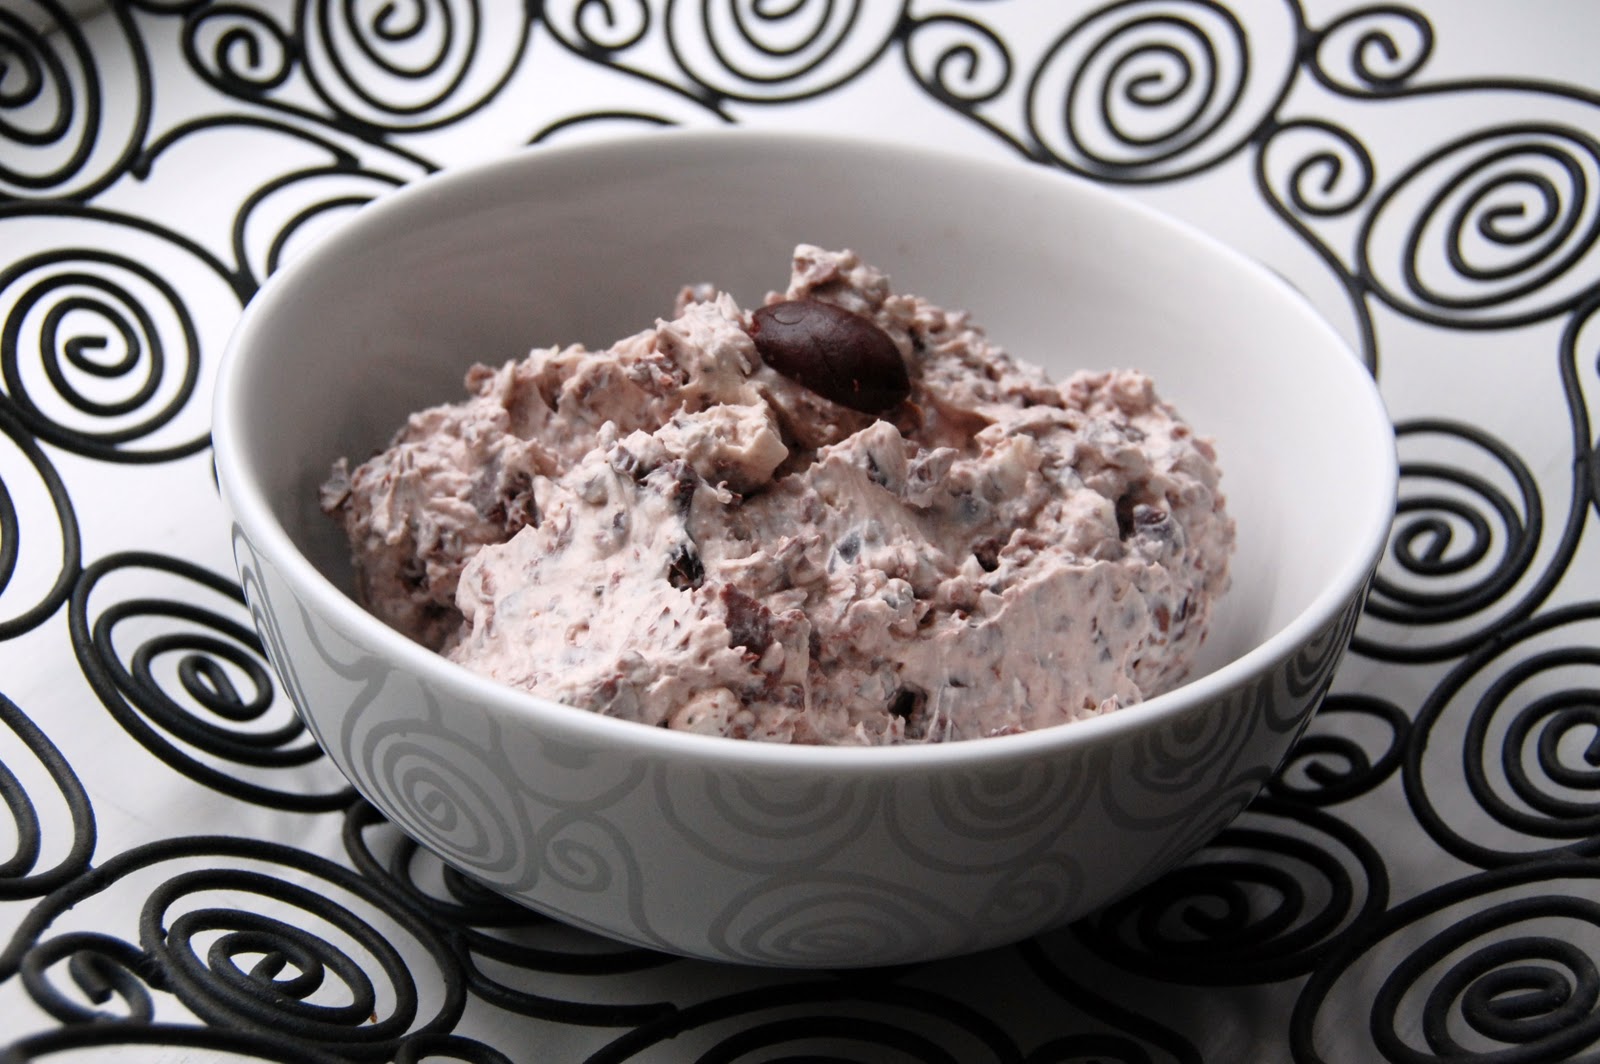
Kalamata Olive Spread


New Years is right around the corner which means more parties and even more food.  This olive dip is a creamy alternative to an olive tapenade and is super simple to make. Be sure to purchase quality olives. The canned variety have a tendency to make the dip taste tinny -- not sure if that's even a word, but you know what I mean. Jarred, olives are work fine, but if you have access to fresh olives at your grocery store or Mediterranean type market even better.

Ingredients
1 cup pitted Kalmata olives (about 40 to 50 olives)
1 large clove of garlic
2 Tablespoons fresh parsley
1 8 oz. package of cream softened cream cheese.

Directions

  • Roughly chop olives, garlic and parsley in a mini food processor or food chopper then place in a medium mixing bowl.
  • Add soften cream cheese and stir.
  • Chill for 2 hours and pair with your choice of crackers or rustic bread. I like serving this dish with Athenos Garlic & Herb Pita Chips

Servings
2 cups of dip

A Broken Oven Tip
Serve the dip alongside a plate of sundried tomatoes, banana peppers or seasoned meats such as cappicola or prosciutto.

Happy Holidays from Us to You!

Every Fall I begin to think of small gifts I could give family and friends for the holidays. Over the years I've given gifts of cookies, candies, poinsettias, bottles of wine, ornaments and more, but I've always been dissatisfied because it never seemed to be personal enough. One gift I've always wanted to give was a personal recipe book of all my favorite recipes that either I enjoy making or my family and friends enjoy eating. The glitch has always been the cost associated with printing, binding and mailing the books.  I don't know why I didn't think of it sooner, but this year I put my plan into action and created The Broken Oven -- a food blog to share with my family and friends. This is our holiday gift from our family to you!

The Broken Oven is filled with nearly 50 recipes I've received from family and friends throughout the years, as well as recipes I've found from the masters, but have adapted to work for my skill level, ingredients availability or my family's picky palate. Each recipe includes a photo of the completed dish I took in my home studio which is also known as the window seat in my kitchen. The Feasting Photos Section includes a few photos of people --okay mostly my kids-- enjoying some of the food prepared for this blog project.  They're cute kids so check it out!

You're also probably wondering why the blog is named The Broken Oven. Most of my adult life I've cooked in an oven that is broken one way or another. Whether it's a burnt out oven light, a quirky oven door that doesn't quite shut, a missing knob, a broken burner or like my current oven where it takes 30 minutes or more to heat the oven to 350 degrees.  Even though I've been oven challenged most of my cooking career the food has always been good -- or so I've been told.

Feel free to make comments whether it's just a hello or a suggestion on how to make the recipe even better. I'm going to attempt to maintain this blog and add new recipe when the mood hits and time allows. Check back often or follow me on Twitter or Facebook for updates.

I truly hope you enjoy this blog as much as I enjoyed putting it together. Now...GO EAT!

Baked French Toast Casserole


Between the two of us, my sister really is the better baker and cook -- "Hi Annette!". I've been inspired for years by her entertaining skills and eagerness to try new recipes. Of course Annette, being Annette the recipes always turn out great and me being me, am always more than willing to eat what she makes.  She's made this Paula Deen French Toast Casserole on several occasions, sans nuts of course, and I finally decided to give it a try this Fall when I had an abundance of stale bread and pecans to get rid of. This is the perfect make ahead dish for breakfast or brunch. Just prepare it the night before, pop it in the oven in the morning, bake and enjoy.

Ingredients

French Toast
1 loaf French bread (13 to 16 ounces)
8 large eggs
2 cups half-and-half
1 cup milk
2 tablespoons granulated sugar
1 teaspoon vanilla extract
1/4 teaspoon ground cinnamon
1/4 teaspoon ground nutmeg
Dash salt

Praline Topping 
1/2 pound (2 sticks) butter
1 cup packed light brown sugar
1 cup chopped pecans
2 tablespoons light corn syrup
1/2 teaspoon ground cinnamon
1/2 teaspoon ground nutmeg

Directions
  • Slice French bread into 20 slices, 1-inch each. 
  • Arrange slices in a generously buttered 9 by 13-inch flat baking dish in 2 rows, overlapping the slices. 
  • In a large bowl, combine the eggs, half-and-half, milk, sugar, vanilla, cinnamon, nutmeg and salt and beat with a rotary beater or whisk until blended but not too bubbly. 
  • Pour mixture over the bread slices, making sure all are covered evenly with the milk-egg mixture. 
  • Spoon some of the mixture in between the slices. Cover with foil and refrigerate overnight.
  • The next day, preheat oven to 350 degrees F.
  • Prepare Praline Topping and spread evenly over the bread and bake for 40 minutes, until puffed and lightly golden. Serve with maple syrup.

Servings
6 to 8 servings as a main dish

A Broken Oven Tip
Make this casserole without the praline topping and serve with a strawberry or blueberry fruit topping instead.

Puffy Pancake Popovers


Breakfast for dinner?  We do it at least two or three times a month at our house.  Charlie is the Master of All Things Breakfast, but I am the Princess of Petite Puffy Pancake Popovers. Ha! How do you like that for alliteration? These light and airy delights are easy to make and fun to watch bake. Try different fruit toppings, peanut butter and jelly, caramel sauce or whipped cream. Mmmm delicious.

Ingredients
1 cup milk
1 cup flour
6 eggs
1/4 cup melted butter
2 tablespoons sugar
1/4 teaspoon of cinnamon
Dash of salt

Directions
  • Preheat oven at 400 degrees.
  • Coat muffin tin cups with cooking spray -- you can also use a 9 x 13 baking dish or jelly roll pan.
  • Using a blender mix together milk, flour, eggs, butter, sugar, cinnamon and salt until smooth
  • Put an 1/8 cup of batter in each muffin cup.
  • Bake at 400 degrees for 15 minutes or until light golden brown.
  • Allow to cool and remove from muffin tin with a butter knife.
  • Top with your favorite topping.  We like strawberries with powdered sugar or plain old butter and maple syrup at our house,

Servings
24 popovers or fills a 9×13 baking dish or jelly roll pan.
Note: Remember only 1/8 cup of batter was used in each muffin cup. Twenty-four may seem like a lot, but these are extremely light and airy. My kids and I easily can eat 3 or 4 popovers along with a side dish for a meal.

A Broken Oven Tip
Omit the sugar and cinnamon to make these savory by adding a dash of your favorite herb and top with  roasted vegetables, cheese -- even try adding shredded beef or chicken.

Sausage -n- Grits Meatloaf


Not being from the South, grits are a treat to me and any time I come across a recipe which uses them as an ingredient I usually make it. Cheesy grits with garlic shrimp is my favorite grit recipe; which I may add to this blog one day, but this meatloaf recipe is a close second. The reasons it's a close second is the sausage gives it a nice flavor; cooking it in a crock pot keep it moist as well as easy to cook and it's a delicious, yet inexpensive family meal. Oh, and the foil lining in the crock pot also makes for an easy clean up. There really is so much to love about this recipe. Give it a try.  I bet it will become one of your favorites too.

Ingredients
2 16-inch square sheets of aluminum foil
1 pound ground beef
1/2 pound bulk pork sausage
1/3 cup liquid egg whites
1/3 cup dry grits
1/4 cup chopped onion
1/2 cup chopped spinach (optional)
2 cloves of garlic crushed
1/2 cup ketchup
2 dashes Worcestershire sauce

Directions
  • Fold each sheet of aluminum foil in half lengthwise, then fold in half lengthwise again, to make 2 strips of foil 4 inches wide by 16 inches long. Place the strips into the bottom of a slow cooker in a cross, so that the long ends of the strips come partway up the inside of the cooker(to make lifting handles. 
  • Spray the inside of the slow cooker and the foil strips with cooking spray.
  • Mix together the ground beef, pork sausage, egg whites, grits, chopped onion, crushed garlic cloves,  ketchup, and Worcestershire sauce until thoroughly combined, and form into a rounded loaf. 
  • Place the loaf into the slow cooker on top of the crossed foil strips.
  • Cover the cooker, set on Low, and cook for 5 to 6 hours. 
  • Carefully remove the meatloaf by holding the ends of the foil strips, and gently lifting the meat loaf from the cooker by the foil handles. Slice and serve.

Servings
Approximately 6 to 8 slices.

A Broken Oven Tip
Substitute barbecue sauce, cream of mushroom soup or pasta sauce for a flavor variation. Adding small cubes of different types of cheese is yummy too.

Mashed Cauliflower


In the past I've pureed cauliflower and hid it in mashed potatoes in an effort to increase my kids vegetable intake. However, one evening I was feeling a bit daring and decided to doctor up the mashed cauliflower and serve it on it's own.  Surprisingly, the kids loved it, even Will. The prep is a little bit of work but the results is a deliciously creamy side dish that could easily pass for mashed potatoes.

Ingredients
1 medium head cauliflower, cut into florets
1/4 cup fat-free milk
2 tablespoons canola oil
1/4 teaspoon salt
1/8 teaspoon pepper

Directions
  • Steam cauliflower for approximately 8 - 10 minutes or until tender. Cool slightly.
  • Put the milk and oil in a blender or food processor.
  • Add the cauliflower, salt and pepper
  • Cover and process until blended.
  • Transfer to a bowl and serve immediately.

Servings
Makes approximately 4 to 6 servings.

A Broken Oven Tip
Add a clove of garlic or top with your favorite cheese for extra flavor.

Tuscan White Bean Stew


My little Lila is the most adventurous eater of the three kids, so if I want to try a new recipe I'll make it for lunch instead of dinner first.  That way I get to eat something other than macaroni and cheese, Lila gets to try something new and we both can enjoy a delicious mommy-daughter lunch.  When choosing these lunches I prefer meals that freeze well so it won't go to waste if I'm the only person who ends up eating it. Lila loves beans and she loved this Tuscan Bean Stew lunch which meets the freezer criteria and is also a hearty healthy, high fiber, cold weather dish to boot. If your family has a more sophisticated palate than mine, serve the stew with crusty bread and a Cesar salad for a savory vegetarian dinner.

Ingredients
2 cups dried Great Northern beans, picked over, rinsed, soaked overnight and drained
6 cups water
1 teaspoon salt
1 bay leaf
2 tablespoons olive oil
1 yellow onion, coarsely chopped
3 carrots, peeled and coarsely chopped
6 cloves garlic, chopped
1/4 teaspoon freshly ground black pepper
1 tablespoon chopped fresh rosemary
2 cups vegetable stock or broth
2 cups garlic croutons
1 1/2 cups of grated Parmesan cheese

Directions
  • Combine white beans, water, 1/2 teaspoon of the salt and the bay leaf in a large soup pot and bring to boil .
  • Reduce the heat to low, partially cover and simmer for 60 to 75 minutes or until the beans are tender.
  • Drain the beans, reserving 1/2 cup of the cooking liquid. Discard the bay leaf.
  • Place the cooked beans into a large bowl and save the cooking pot for later use.
  • In a small bowl, combine the reserved cooking liquid and 1/2 cup of the cooked beans. Mash with a fork to form a paste. Stir the bean paste into the cooked beans.
  • Return the cooking pot to the stove top and add the olive oil. Heat over medium-high heat.
  • Stir in the onion and carrots and saute until the carrots are tender-crisp.
  • Stir in the garlic and cook until softened.
  • Stir in the remaining 1/2 teaspoon salt, the pepper, chopped rosemary, bean mixture and stock.
  • Bring to a boil, then reduce the heat to low and simmer until the stew is heated through.
  • Top with 1/3 cup croutons and 1/4 cup of grated Parmesan cheese.

Servings
6 - 8